A still with thumper keg is not a plug-and-play appliance, and the people who get burned by one almost always get burned in the same two places: the cooling water and the seals. The boiler is the easy part. Anyone can pour liquid into a pot and light a burner under it.
What separates a clean run from a mess on the garage floor is whether the vapor has somewhere cold to go when it arrives, and whether every joint between the boiler and the condenser is actually sealed. I have spent enough brew days chasing leaks and fighting heat exchange to know that the unglamorous half of the equipment is the half that decides whether you finish.
This guide walks through the whole thing: what to buy, how to assemble it, how to build a cooling loop that does not run your tap for three hours, and the specific failure points that turn a run into a cleanup job. It is written for the 13-gallon class of equipment, because that is what most people end up buying after they outgrow a 5-gallon pot.
Why you should trust me
I have been brewing for twelve years and I have more than 50 logged batches behind me, from a 1.030 session bitter to a 1.100 barleywine. Before that I spent three years as the assistant brewer at a 7-barrel brewpub in Grand Rapids, where my job was scrubbing heat exchangers, harvesting yeast, and running pH and gravity checks on every tank, every day.
That job is why I care about this topic. A brewhouse lives or dies on heat exchange. When a plate chiller fouls or the glycol loop runs warm, the beer tells you within 24 hours. A still runs on the same physics with higher stakes: if the vapor reaching the condenser does not collapse fast enough, it escapes, and you lose the run.
I will be straight about what I am not. I am not a commercial distiller and I do not hold a TTB permit. Everything here is the equipment side, which is the part I know from a decade of moving hot liquid around and writing down what happened. I calibrate my hydrometer in distilled water at 60°F before every batch, and I keep a spiral notebook with strike temps, mash pH, and packaging losses. Numbers or it did not happen.
How I picked what is in this guide
I did not test 20 stills. Nobody has, and anyone who claims to has a spreadsheet full of press releases. What I did was apply the same four-question filter I use on brewing gear:
- Can I replace every gasket, clamp, and hose without ordering from the manufacturer?
- Does the listing tell me what the seals are made of, or does it hide behind the phrase "food grade"?
- Does the cooling demand fit a garage, or does it need a hose bib running wide open for two hours?
- Is the capacity honest? A 13-gallon boiler is not a 13-gallon batch.
Both items below clear that filter on paper. Neither one is a laboratory instrument, and I would rather tell you that up front than pretend otherwise.
What you need before you start
You need four things: a heat source with enough output for the boiler, a space with real ventilation, a cooling water supply, and a way to move that water. The first three are decisions. The fourth is a purchase, and it is the one people skip.
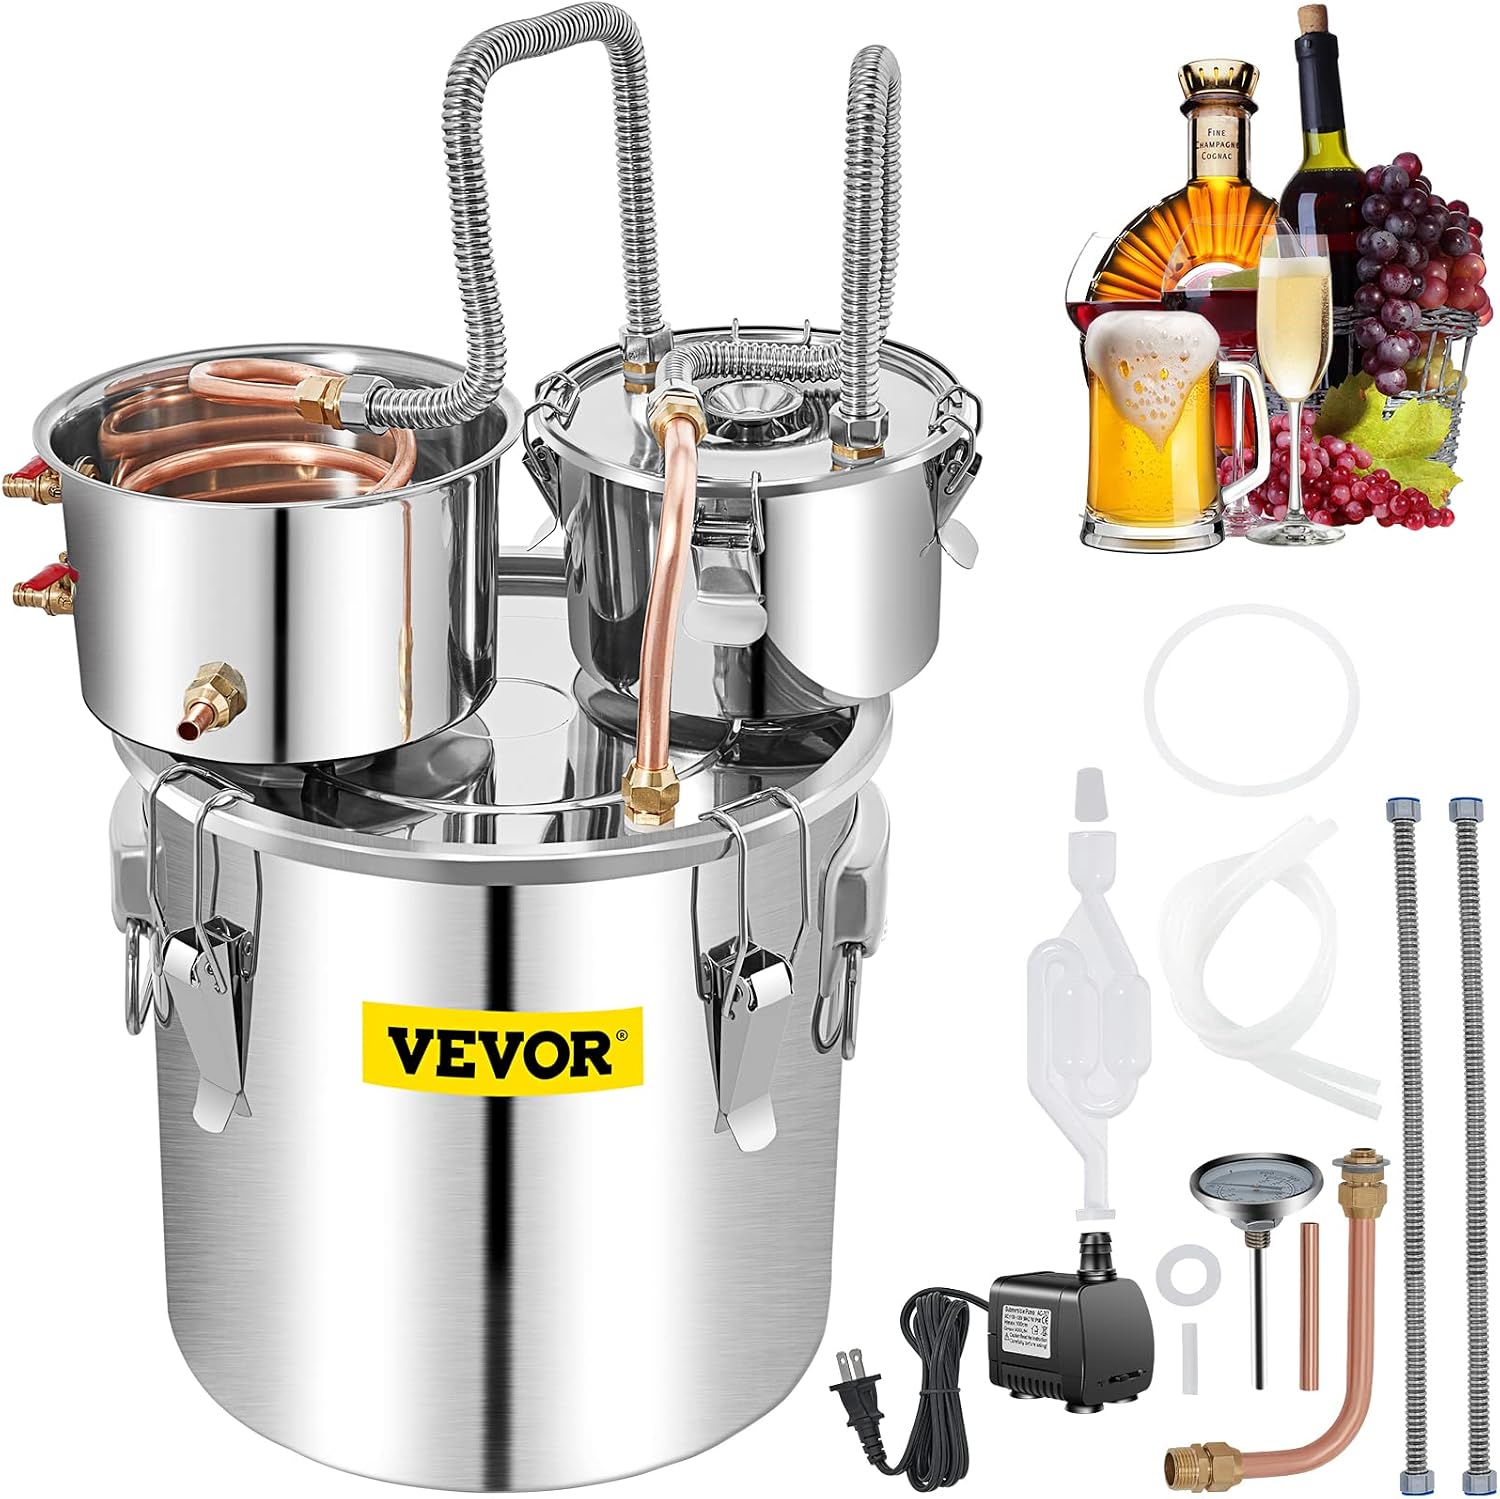
The main unit: VEVOR Alcohol Still 13 GAL 50 L Alcohol Distiller Kit with Thumper Keg
 Visit on Amazon →
This is the centerpiece: a 13-gallon, 50-liter boiler with a thumper keg in the same kit, which means you are buying a two-stage setup rather than a single pot with a coil on top. The thumper matters because it gives the vapor a second pass before it reaches the condenser. Vapor leaves the boiler, bubbles through whatever liquid you charge the thumper with, and comes out of that second vessel cleaner than it went in. That is the entire reason to run a thumper instead of a plain pot still.
The practical consequence of 13 gallons is that you need to plan around it before it arrives. A boiler this size wants a sturdy surface, a burner that can actually drive it, and enough headroom that you can get the lid on and the column attached without ducking under a garage door. Measure your space first. I have watched people buy capacity they had nowhere to put.
The failure points on a kit like this are predictable: the gaskets, the clamps, and the connection between the boiler and the thumper. Check the listing for what the seals are made of and whether replacement gaskets are sold separately. If they are not, buy spares before your first run, not after. A gasket is not the thing you want to be improvising with tape at minute 40.
One more thing worth saying plainly: capacity is the boiler's volume, not your yield. Fill levels exist for a reason. Vapor needs room above the liquid, and a boiler filled to the rim pushes foam into the column instead of vapor.
The cooling side: The Quiet One
 Visit on Amazon →
Here is the piece that decides whether your run takes two hours or six. A submersible pump like this one goes in a tub of ice water and pushes that cold water through the condenser, and the warmed water returns to the tub to be chilled again. Instead of running a hose bib wide open and dumping every gallon down the drain, you recirculate maybe 10 gallons all afternoon.
The reason this matters is physics, not convenience. A condenser only collapses vapor as long as the water inside it stays cold. Once the water warms up, vapor stops condensing, pressure builds in the boiler, and the run stalls or worse. Recirculating through ice keeps the temperature differential where it needs to be, and it does it without you standing there swapping buckets.
Two numbers decide whether a given pump is right for your rig: flow rate and maximum lift. Lift is the one people forget. The pump has to push water up to the inlet of your condenser, and if the condenser sits above the pump's rated head, you get a churning tub and no flow. Check both numbers on the listing against the height of your condenser inlet before you buy.
One caveat: this is a water pump. Keep it out of hot wort, out of the boiler, and out of anything you plan to drink. Its job is moving cooling water, full stop.
The setup and run, step by step
Here is the order I would do this in. Skipping a step costs you a run, not a batch of beer, so there is no reason to rush.
Step one: Choose the space. Outdoors or in a garage with the door open. Never in a kitchen. You are producing vapor you cannot see and heat you cannot vent, and any burner big enough for a 13-gallon boiler puts off carbon monoxide. If you cannot smell fresh air, you are in the wrong room.
Step two: Test the seals with water only. Fill the boiler with plain water, assemble everything exactly as you would for a real run, and heat it. Watch every joint. This is the run where a bad gasket costs you nothing but time. Find the leaks here and you will never find them at minute 40 of a real run.
Step three: Set the fill level. Leave real headroom. A boiler this size wants a fill well below the top, because foam and vapor both need somewhere to go. If the kit has a marked line, treat it as a ceiling, not a target.
Step four: Charge the thumper. The thumper gets its own liquid charge. Enough to cover the inlet tube, not enough to flood it. An overfilled thumper pushes liquid into the condenser, and you will spend the next hour wondering why your output is cloudy.
Step five: Build the cooling loop. Tub, ice, pump, hose to the condenser inlet, hose from the condenser outlet back to the tub. Prime the pump before you start the burner, and confirm you have visible flow at the outlet. Never start heating with a dry condenser.
Step six: Do a sacrificial run. Whatever you are making, run a batch you are willing to throw away first. New equipment carries manufacturing residue. Water is a fine sacrificial run for a still, and so is a cheap wash you do not care about.
Step seven: Heat slow, then hold. Bring the boiler up to temperature gradually. A hard, fast boil is how you get foam into the column and a puking boiler. Once vapor starts moving, back the heat down and let the run settle into a steady pace.
Step eight: Watch the takeoff, not the clock. You are managing a rate, not a schedule. If the takeoff slows to a dribble, or the condenser water feels warm to the touch, stop and fix the cooling before you do anything else. Adding heat to a stalled run just builds pressure.
Step nine: Shut down in order. Kill the heat, let the boiler cool, then shut off the pump. Dumping cold water through a hot condenser is how you crack metal. Clean everything the same day. Dried residue on a gasket is how that gasket fails next time.
Where this setup goes wrong
Five failure modes, in the order I would expect to see them.
The condenser runs warm. Almost always a cooling problem, not a still problem. More ice, a bigger tub, or a pump with more flow. Check the water temperature at the outlet with your hand before you blame the equipment.
A gasket lets go mid-run. This is why you buy spares. A leak at the boiler connection means vapor escaping into the garage instead of into the condenser, and the fix is a new gasket, not a tighter clamp on a deformed one.
The boiler pukes. Too much heat, too little headroom, or both. Foam in the column is the number one way a run turns into a cleanup.
The pump is not moving water. Usually lift. A pump rated for a few feet of head cannot push water up to a condenser on a countertop, let alone a tall column. Check the numbers before you build the loop.
The run never stabilizes. Nine times out of ten this is you chasing it with the burner. Pick a heat setting, wait, and let the system find its pace.
And the caveat that outranks all of them: in the United States, distilling alcohol for drinking requires a federal permit from the TTB, and most states layer their own rules on top. Owning a still for distilling water, essential oils, or fuel is a different matter. Know which one you are doing before you light the burner, because the equipment does not care and the law does.
What this all costs
The money breaks into three buckets. The still kit is the big line item, and it determines everything else, because a 13-gallon boiler sets your burner size, your space requirement, and your cooling demand. Check current Amazon price on the listing, and read what the kit actually includes, because "kit" means different things depending on who is selling it.
The pump is the small line item, and it is the one that saves you money on every run. Check current Amazon price, then do the math on water: a recirculating loop uses the same 10 gallons all afternoon, while a straight-through setup uses hundreds of gallons of tap water per run. Over a season, the pump pays for itself in a water bill.
The recurring cost is ice and time. Ice is cheap, and you can freeze your own in containers. Time is the real expense. A 13-gallon boiler takes a while to come up to temperature and a while to cool down, and no piece of equipment changes that. Budget an afternoon, not an hour.
The last bucket is spares. Buy replacement gaskets before you need them. Buy a second hose clamp. Buy a backup thermometer. The people who have bad runs are almost never the people who spent the least money. They are the people who had no spare parts on a Sunday.
A still with thumper keg is a heat exchange problem wearing a pot's clothing. Get the cooling right, seal every joint, and give the vapor somewhere to go, and the equipment does exactly what it says it will. Skip those three things and you will spend the afternoon mopping. Check current Amazon price on both pieces, measure your space, and buy the spares before the first run instead of after it.