Most homebrewers quit over process, not over equipment. Two-stage fermentation is the process step that trips up the most people, because it sounds like an extra chore instead of what it actually is: a control decision. You let primary fermentation finish in a wide vessel with plenty of headspace, then you move the beer off the yeast cake and the trub into a vessel with almost no headspace and almost no oxygen, and you let it clear. A two-stage fermentation setup done right gives you cleaner beer, a final gravity reading you can trust, and a yeast cake clean enough to harvest. Done wrong, it hands your beer a mouthful of wet cardboard.
I have been brewing since 2014, when I scorched a starter kit on a dorm hot plate and invented a style I still call burnt adjunct lager. Twelve years and more than 50 logged batches later, plus three years as an assistant brewer at a 7-barrel brewpub in Grand Rapids, I measure everything and write it down. Original gravity, final gravity, strike temps, mash pH, the 24-hour gravity check, packaging losses, and the exact garage temperature. All of it goes into a spiral notebook with a spreadsheet backup.
The good news is that you do not need much to run this process properly. You need two vessels sized for their jobs, an airlock that actually seals, a siphon you trust, and a hydrometer. That last one is not optional. If you cannot read OG and FG, you are not brewing, you are gambling.
Why you should trust me
I am a process technician at a regional food-and-beverage plant by day, which means I spend my working hours on the same question I ask of brewing gear: does this thing hold its numbers over a long run, or does it drift? I calibrated hydrometers in distilled water at 60°F every morning at the brewpub, ran pH and gravity checks on every tank, harvested yeast, and scrubbed more heat exchangers than I care to remember. I brought that habit home.
The habit is simple. Every batch gets an OG, an FG, a real attenuation calculation, and a note about what the garage did that week. Cheap gear that fails mid-batch has cost me three ruined brew days, including a pump that died mid-sparge on batch 41, and I am still sore about it. So nothing makes a list here until it would survive a full brew day without embarrassing itself.
How I picked and how I tested
This is not a ranking of every kit on the market. It is a short list of the vessel sets that let you run primary and secondary in the same batch without a mid-brew trip to the store. Here is the checklist I put every candidate through:
Headspace math. A five-gallon batch in primary needs room for krausen, which means a vessel with roughly a gallon and a half of open space above the beer. A primary that is filled to the rim is a primary that foams onto your floor.
Oxygen exposure in secondary. Secondary wants a narrow mouth, a small surface area, and beer filled close to the bung. Every inch of headspace in secondary is oxygen you paid for and did not want.
Seal quality. If the lid or the bung does not seal, the airlock lies to you. A stalled-looking fermentation that is actually a leaking lid is the single most common false alarm in this hobby.
Cleanability. Everything in this process collects dried krausen and hop sludge. If a vessel cannot be reached with a brush and a sanitizer solution, it cannot be trusted batch after batch.
Measuring tools. A hydrometer in the box is worth more than any accessory in the box. You cannot log a batch you cannot measure.
I will not recommend a product I would not put my own next batch in, and no placement here is sponsored. If it fails the checklist, it does not make the list.
The two vessels you need before you start
One wide vessel for primary, one narrow vessel for secondary. That is the whole shopping list, plus the seal and the siphon. The two kits below cover that job from different angles: one is built around a primary and secondary pair for five-gallon beer batches, and one is a complete box that includes the measuring tools most kits leave out.
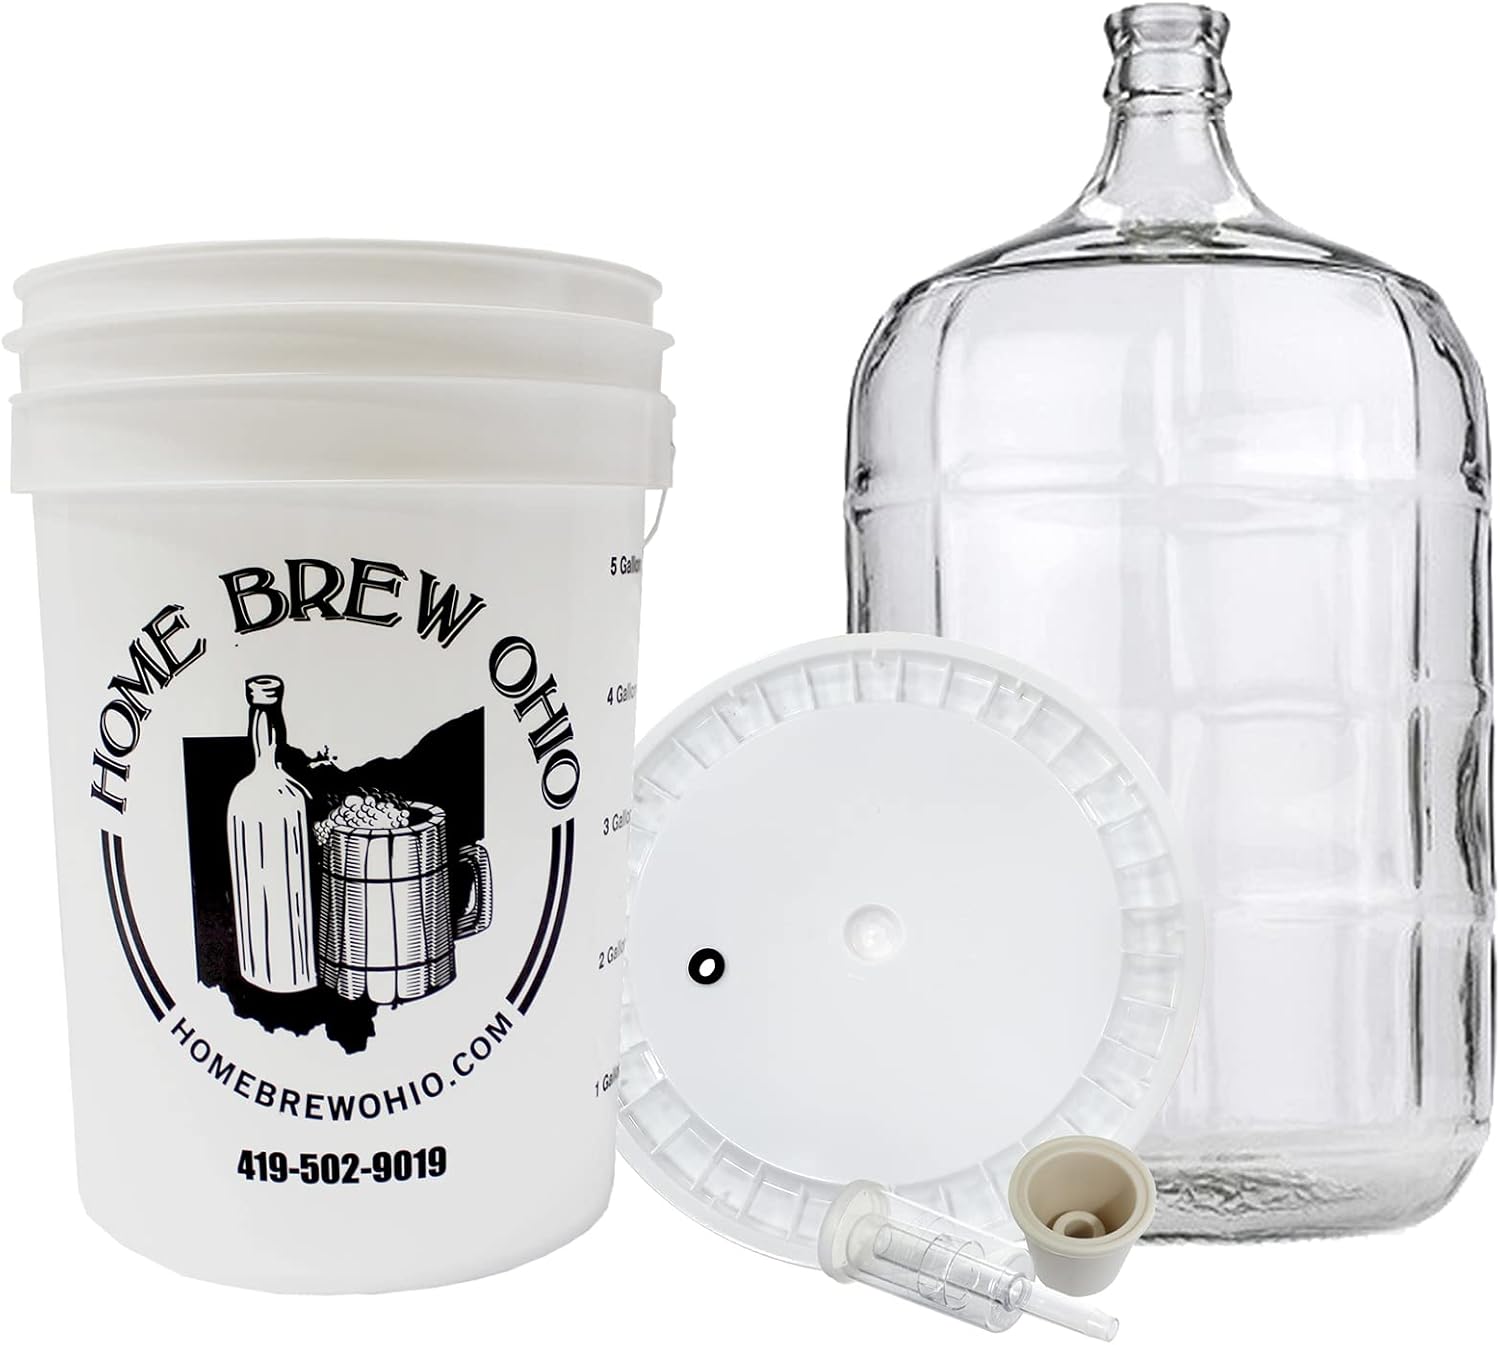
Our pick: Home Brew Ohio Five Gallon Primary and Secondary Fermentation Set-Up (5 Gallon Carboy, 6.5 Gallon Bucket and lid, with Bung and Airlock)
 Visit on Amazon →
This is the pairing that matches the process exactly. The 6.5-gallon bucket and lid is your primary: a five-gallon batch leaves about a gallon and a half of headspace for krausen, and a bucket is the easiest vessel in the hobby to clean, which matters more than most people admit because a primary you cannot scrub is where infections start. The 5-gallon carboy is your secondary: narrow mouth, small surface area, and beer that sits close to the bung instead of under a blanket of air.
The bung and airlock being in the box matters too. Half the leaking-lid stories I hear start with a drilled stopper that almost fits, and a seal you improvised is a seal you cannot trust. Check current Amazon price.
Flaws but not dealbreakers: glass carboys are heavy and slick when wet, so plan how you will move one before it is full and never carry it by the neck. A carboy handle or a milk crate is cheap insurance. The other thing to verify is the bucket lid seal, because a lid that does not seat means your airlock never bubbles and you cannot tell fermentation from a leak.
Home brewers who want a true primary and secondary pair, already own a hydrometer, and brew standard five-gallon batches should start here.
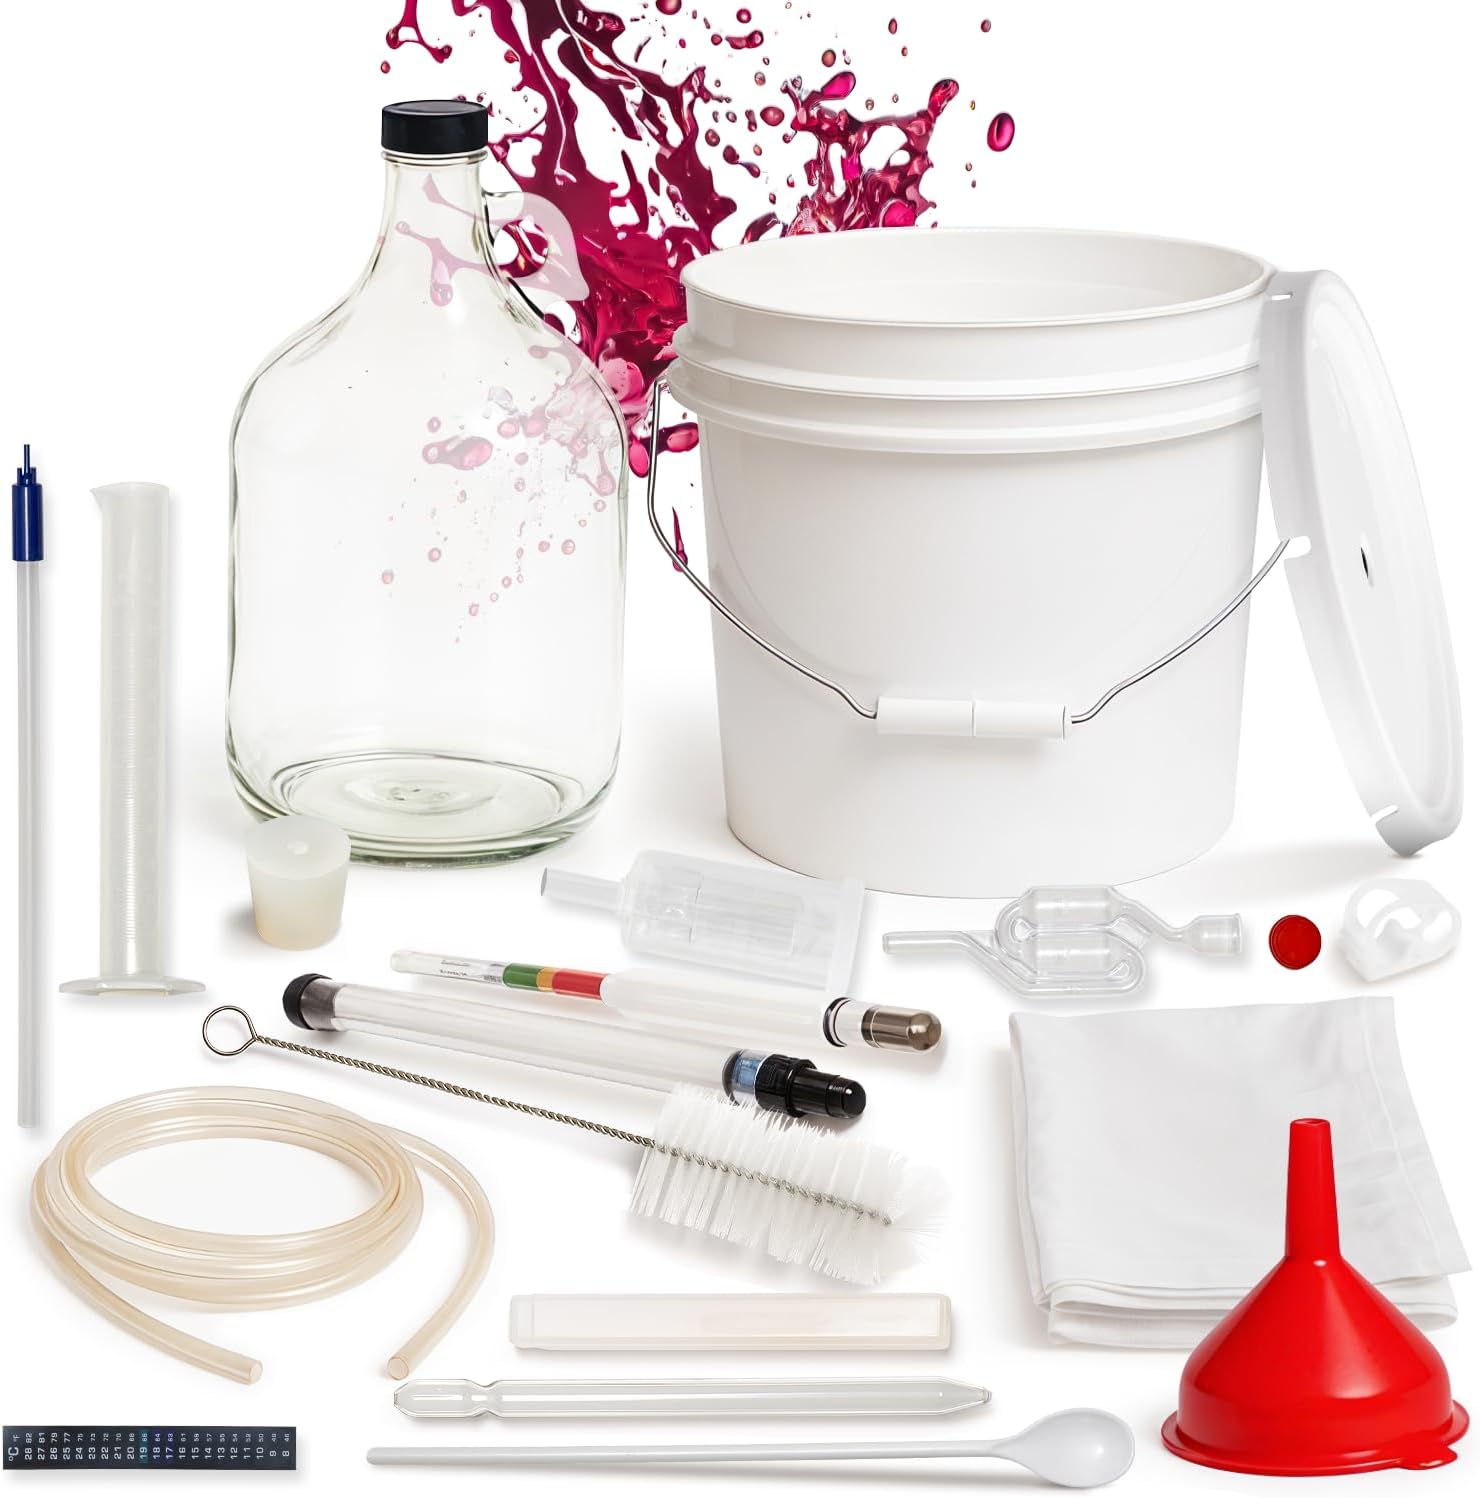
Runner-up: Wine Making Kit & Mead Making Kit | Complete Home Brewing Kit for Beginners & Experts - Includes Glass Carboy, Fermenter, Hydrometer, Siphon, Airlock & More | DIY Wine Brewing Equipment
 Visit on Amazon →
Here is why a wine and mead kit shows up in a beer article: it ships with a hydrometer. A kit that includes the single most important measuring tool in the hobby puts you ahead of every kit that skips it, and it also includes the siphon, which is the tool you actually rack with. The glass carboy and the fermenter give you the two-vessel structure, and the airlock seals the deal.
The trade is that it is built around wine and mead, so the volumes and the accessory mix lean that direction. If you plan to brew five-gallon beer batches with it, check the fermenter volume against your krausen headspace before you commit. If you want to make a batch of mead in a spare carboy between beer batches, this box does that job with no extra shopping. Check current Amazon price.
Flaws but not dealbreakers: it is a wine-first kit, so treat the fermenter volume as the number to verify for beer. Anyone who wants one box with the measuring tools and the siphon included should look here first.
The actual two-stage fermentation workflow
Now the part you came for. This works with any primary and secondary pair, as long as both seal and both are sanitized.
Step one: Sanitize everything that touches the beer after the boil. Mix your no-rinse sanitizer to the label ratio and give the bucket, lid, carboy, bung, airlock, siphon, and hydrometer the full contact time on the label. Sanitizer works on contact time, not on a quick dunk.
Step two: Chill and transfer to primary. Get the wort down to your yeast's recommended pitching range, transfer it to the bucket, and aerate it well. This is the one point in the process where oxygen is your friend, so splash and stir now. I log the garage temperature at this moment because that is the number that will decide how the fermentation behaves.
Step three: Take the original gravity before you pitch. Fill your hydrometer test jar, spin the hydrometer to knock the bubbles off it, and read it at the calibration temperature. Write the number down. Skip this and you have no idea what your beer did, no matter how good it tastes.
Step four: Pitch and seal. Fit the lid, seat the bung, and fill the airlock to the line with sanitizer or cheap vodka. Put the vessel somewhere dark with a stable temperature, out of the way of foot traffic and temperature swings.
Step five: Wait for the gravity, not the calendar. Primary is done when the gravity stops moving, which means two readings 48 to 72 hours apart that match. For most ales that lands somewhere in the four-to-ten-day window, but the hydrometer decides, not the recipe. Racking on day seven because a sheet of paper said day seven is how you end up with a stuck fermentation and a sweet, hazy beer.
Step six: Rack to secondary. Sanitize the siphon and the carboy. Start the siphon and let the carboy fill from the bottom, keeping the outlet below the surface of the beer so you never splash. Leave the trub and the yeast cake behind. If you end up with more than an inch or two of headspace, top up with a little boiled and cooled water or finished beer, because oxygen is the enemy at this stage.
Step seven: Let it finish and clear. Secondary is for clearing, dry hopping, and adding fruit, not for a second fermentation. Two to four weeks is typical for a mid-gravity ale. Take another gravity reading when you think it is done.
Step eight: Package and log it. Confirm your FG twice, calculate real attenuation and ABV from the OG and FG gap, then rack to your bottling bucket or keg, prime or force carbonate, and write the batch down. Packaging losses count too. That is how you learn your system.
Where this process goes wrong
Racking too early is the big one. Moving beer off the yeast before the gravity has stabilized stalls the fermentation and leaves sugar behind.
Splashing during transfer is the second. Every splash in secondary is oxygen pickup, and oxygen pickup in a finished beer tastes like cardboard within a few weeks.
Too much headspace in secondary is the third. A half-full carboy is a carboy full of air, and air is what you were trying to escape.
Not checking the seal is the fourth. Before you panic about a stalled batch, press the lid down and watch the airlock. If it does not move, the problem is the lid, not the yeast.
And skipping the hydrometer is the fifth. Without OG and FG, you cannot calculate attenuation, you cannot calculate ABV, and you cannot tell a finished beer from a stalled one.
Where two-stage is the wrong call
This is the honest caveat. Every transfer carries oxygen risk, and for a lot of styles you can skip secondary entirely. If you are not dry hopping, not adding fruit, and not harvesting the yeast cake, a single-vessel primary with a cold crash and careful racking straight to the packaging vessel will make excellent beer. The two-stage fermentation setup earns its place when you want a clean yeast cake, when you are adding something after primary, or when you want the beer off the trub for a long, slow clear.
What a two-stage setup will not do is fix a temperature problem or a sanitation problem. A beer fermented at 82°F tastes like banana bubblegum whether it spent two weeks in one vessel or two. Control the temperature, sanitize like it matters, and the process rewards you.
What this costs and what it saves
Both kits here sit in the same general class of purchase, and both are cheaper than the batch you will dump if you rack by calendar instead of by gravity. Check current Amazon price on each one and compare what is actually in the box, because the deciding factor is not the vessel count. It is whether the box includes a hydrometer and a siphon, or whether you have to buy them separately and end up improvising a racking cane out of tubing.
The math on this hobby is not complicated. A hydrometer costs less than a single ruined five-gallon batch, and it is the only tool in the kit that tells you the truth about what your yeast did. Everything else is plumbing.
The bottom line
Pick two vessels that fit their jobs, one wide for primary and one narrow for secondary. Sanitize both, seal both, and take a gravity reading before you pitch and again before you package. The number at 60°F does not care what the box said, and it does not care what the recipe said. It only cares what actually happened in your garage.
That is the job. Two vessels, a hydrometer, and a notebook. Write it down and your next batch gets better on purpose.