Most first batches come out of a Mr. Beer homebrew kit, and most of those first batches taste like something between flat cider and banana bread. The kit is rarely the problem. The problem is that nobody tells a new brewer the two temperatures that decide everything: the temperature of the wort when the yeast goes in, and the temperature of the room where the fermenter sits for the next two weeks.
I brewed my first batch in 2014 on a dorm room hot plate with a kit that scorched so badly I thought I had invented a new style. I still call it burnt adjunct lager. Twelve years and more than 50 logged batches later, plus three years as an assistant brewer at a 7-barrel brewpub in Grand Rapids, the lesson has not changed. Control temperature and you make beer that tastes like beer. Skip it and you make an experiment.
This is the how-to: what a first brew day actually requires, the order to do it in, and the one cheap tool that stops you from guessing in the middle of it.
Why you should trust me
I am Drew Calloway, and I brew in a garage in Grand Rapids, Michigan, where the temperature swings 30 degrees between October and April. I have 50-plus batches in a spiral notebook with a spreadsheet backup, everything from a 1.030 session bitter to a 1.100 barleywine. From 2019 to 2022 I worked as the assistant brewer at a 7-barrel brewpub, where I scrubbed heat exchangers, harvested yeast, and ran gravity and pH checks on every tank, every day.
That job taught me the habit that runs this site. I measure, then I write it down. My hydrometer gets calibrated in distilled water at 60°F before every brew day, because a 0.002 error at the start of the day is a 0.002 error at the end of it, and a bad reading poisons a batch log. I do not quote a manufacturer's spec sheet as if it were a measurement. If a number did not come off my own instrument, it does not go in the notebook.
Cheap gear has cost me three full brew days. A $35 pump died mid-sparge on batch 41, and I still have not forgiven it. That is why nothing here gets recommended until it can survive a full brew day without embarrassing itself.
How I picked and how I tested
I do not rank brewing gear by the adjectives on the box. Every item gets held against one question: does this help me read a real number, or does it make me guess?
For a first batch, that question narrows to a short list:
- Can I read the temperature of the wort without lifting a lid and losing heat?
- Does the tool give me the same reading twice, or do I have to interpret a needle?
- Does the kit include everything needed to finish the batch, or does it quietly stop at the fermenter?
- What breaks first? On most starter kits it is a plastic spigot. On most thermometers it is a stem that was never meant to sit in a boil.
- Does the instruction sheet give me numbers, or does it tell me to trust my instincts? Instincts are why my first batch fermented at 82°F and tasted like banana bubblegum.
Both items below are held against that checklist, not against a spec sheet. Neither one is a lab instrument and neither one pretends to be. They are the tools that get a first batch from box to bottle without a guess in the middle.
The gear a first brew day actually needs
Everything else in brewing is optional at batch one. You need a fermenter, a way to boil a few gallons of wort, bottles, sanitizer, and a way to read temperature. The two items below cover the first and the last.
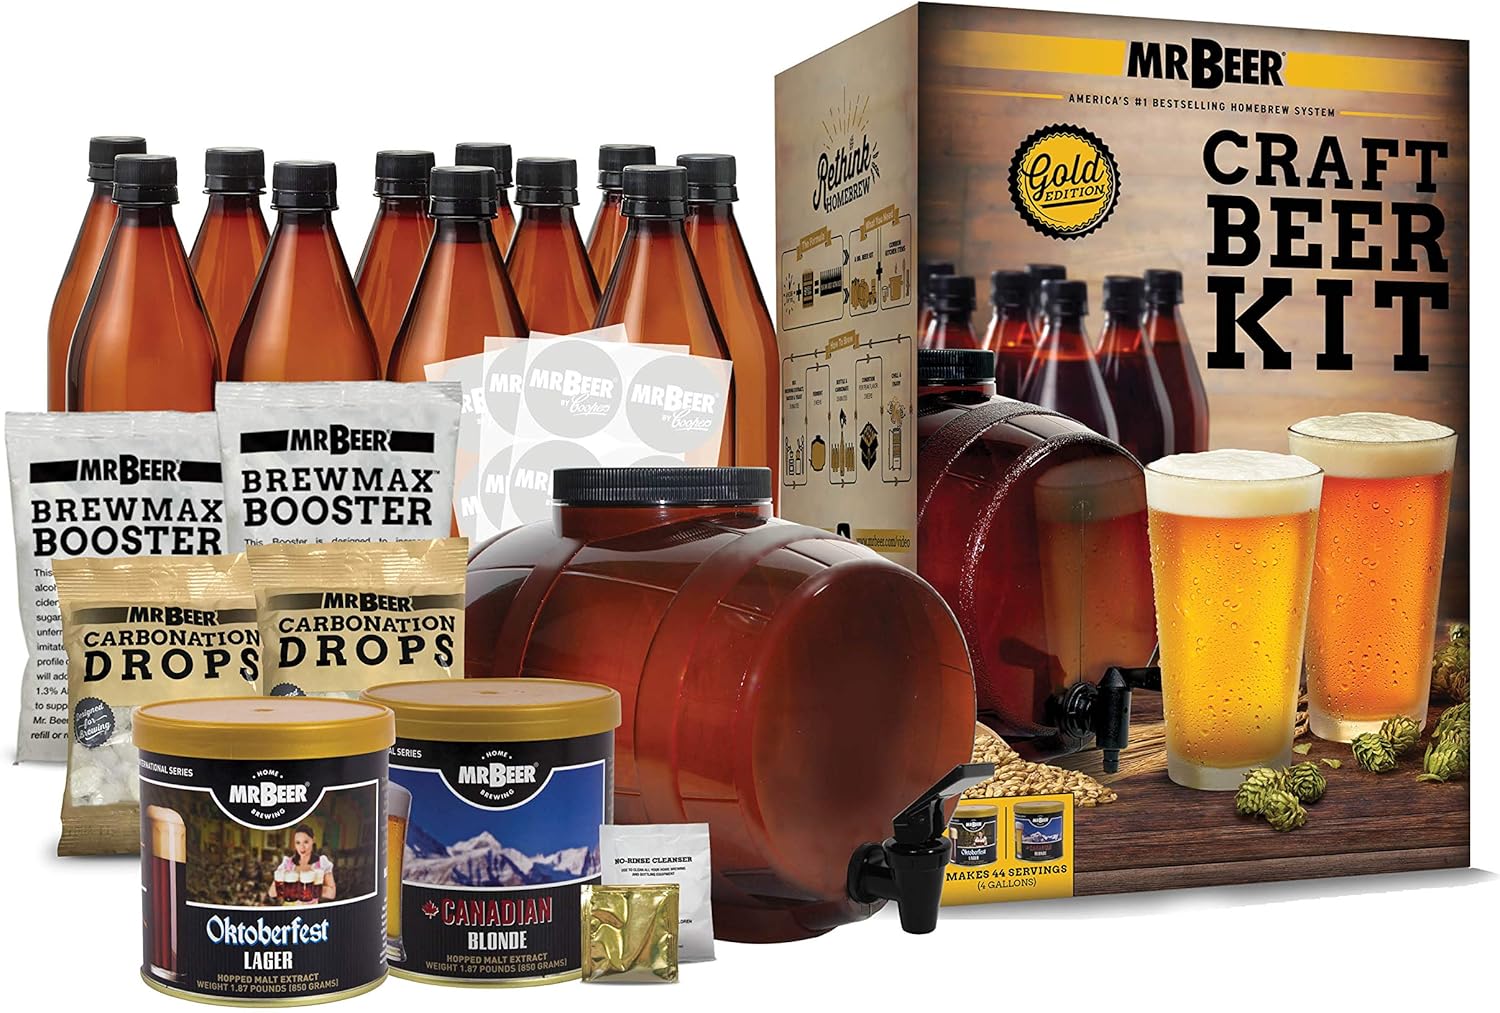
The starter kit: Mr. Beer - Craft Beer Making Kit 4 Gallon Complete DIY Home Brew Set Everything Included, Bottles, Refills Brew in 30 Minutes
 Visit on Amazon →
This is the kit most people start on, myself included. It is a 4-gallon extract setup: fermenter, the pieces that go with it, bottles, and a refill so you can brew without shopping for ingredients first. The 30-minute claim refers to the time it takes to mix the wort, not the time it takes to make beer, and that distinction matters. Fermentation still takes about two weeks. Carbonation still takes another two.
What the kit does well is remove the decisions that stop beginners. There is no mash, no sparge, no grain bill to build. You add water, add the extract, stir, cool, pitch, and wait. That leaves exactly one variable you can still ruin, and it is temperature.
What it does not do is measure anything for you. Check the box before brew day. If there is no hydrometer in it, buy one, because you cannot know your OG, your FG, or your real attenuation without it. An airlock bubbling is not a measurement.
Flaws but not dealbreakers: Plastic spigots drip eventually. That is true of nearly every starter fermenter, not just this one, and a replacement spigot costs less than a ruined batch. Buy one on day one and swap it out before it fails on bottling day.
Anyone who wants to find out whether they enjoy brewing before spending real money should start here. If you already know you like it, skip ahead and buy the gear you will keep.
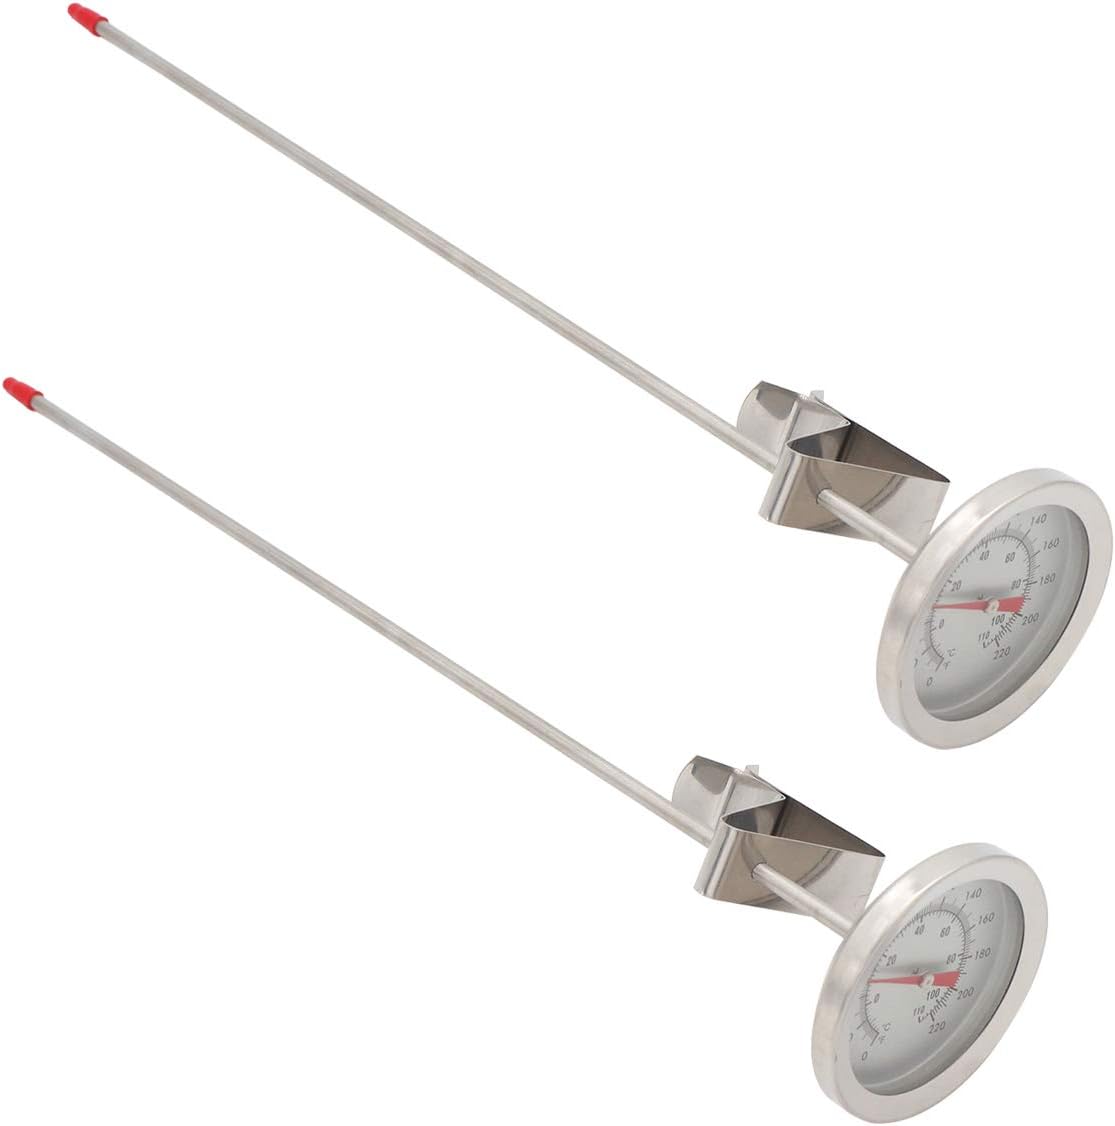
The temperature tool: Homebrew Kettle Clip On Thermometer,Dial Thermometer,12" Stainless Steel Stem Meat Cooking Thermometer
 Visit on Amazon →
A clip-on dial thermometer is the cheapest honest answer to the temperature problem. The clip holds it on the kettle rim, the 12-inch stainless stem puts the sensing point down in the liquid, and the dial stays above the wort where you can read it without lifting the lid. That last part is the whole point. Every time you pull a lid off to check, you lose heat and add time to your brew day.
The stem length is worth thinking about. Twelve inches reaches deep into a kettle, which is what you want at full boil volume, and it also means the dial sits well above the rim on a shallow pot. Keep the tip off the bottom of the kettle. A probe resting on the metal bottom reads the burner, not the wort, and it will read high every single time.
Flaws but not dealbreakers: This is a dial, not a digital probe. Dials are slower to settle and you are reading a needle against a printed scale, so treat the number as close, not exact. That is fine for a steep, a chill, and a pitch. It is not fine for a mash where two degrees changes the beer, and it is not a substitute for a calibrated hydrometer when you are measuring gravity.
A thermometer sold for cooking works here because temperature is temperature. Clip it to the kettle on brew day, clip it to the pot on chili night.
The brew day, step by step
Step one: Clean and sanitize before anything else. Everything that touches wort after the boil gets sanitizer. The kettle and the boil itself do not need to be sterile, the heat handles that. The fermenter, the lid, the spigot, the stirring spoon, the hydrometer, and the bottles do.
Step two: Get the water volume right. Follow the kit instructions for your batch size. A 4-gallon batch is more liquid than a stock pot holds comfortably, so leave headspace. Hopped wort foams at a rolling boil, and a kettle filled to the rim will boil over. That is not a maybe, it is a when.
Step three: Clip the thermometer on before you apply heat. Set the clip on the rim, put the stem in the liquid, keep the tip off the bottom. Now you can read temperature the whole way through the day instead of guessing at three points.
Step four: Steep and heat. If your recipe uses specialty grains, they go in as the water warms, and the thermometer tells you when you are in range. On a straight extract batch, you are watching for the point just before the boil.
Step five: Boil and add hops on the clock. The boil timer starts when the wort is actually rolling, not when the burner clicks on. Add bittering hops at the start and the later additions at the times the recipe gives. Set a timer. Do not eyeball it.
Step six: Chill the wort to pitching temperature. This is where most first batches go wrong, and this is where the thermometer earns its place. Yeast pitched into wort that is still too warm throws the esters that taste like banana and bubblegum, and no amount of waiting fixes it. Chill until the dial reads inside the range on the yeast packet, then go a couple of degrees past it, because the reading climbs while you carry the pot.
Step seven: Take your original gravity. Cool a sample to the hydrometer's calibration temperature, read it, and write it down with the date. That is your OG. Everything you learn about this batch later gets measured against it.
Step eight: Pitch, seal, and put it somewhere boring. A closet floor, a basement corner, an interior wall. Not next to a furnace, not in a garage that swings 30 degrees overnight, not on top of the fridge. Log the room temperature every day.
Step nine: Wait, then measure again. Two hydrometer readings three days apart that match means fermentation is done. Bottle, prime, and wait two more weeks for carbonation.
Where first batches actually go wrong
Every failed first batch I have tasted failed in one of four places.
Pitching too warm. The yeast packet gives a range for a reason. Warm wort ferments fast and tastes like solvent and fruit candy. Cool wort ferments clean.
Fermenting in a room that swings. The first 72 hours matter most, and that is exactly when a garage or a sunny kitchen window swings hardest.
Trusting the airlock. Airlocks bubble for reasons other than fermentation, and they stop bubbling for reasons other than completion. The hydrometer is the honest tool. If you keep a refractometer too, use the hydrometer for the final reading and the refractometer for quick checks, because a refractometer reading needs a correction once alcohol is in the sample.
Skipping sanitation after the boil. Before the boil the wort is not beer yet and heat will save you. After the boil, everything that touches it has to be clean. It is the cheapest fix in brewing and the most commonly skipped.
What you do not need yet
There is a lot of gear marketed at people on their first batch. Most of it can wait.
An all-in-one electric system is a great purchase for batch five, not batch one. A keg setup means skipping bottles, but it also means a CO2 tank, a regulator, lines, and a way to keep it cold. A wort chiller speeds up step six, and you can chill a small batch in an ice bath in the sink. A stir plate and flask matter when you start building yeast starters, which is a batch fifteen habit.
Buy the kit, buy the thermometer, buy a hydrometer if the kit does not include one, and spend the rest of the budget on ingredients. You will learn more from four batches than from one expensive system.
What this all costs
- Mr. Beer Craft Beer Making Kit: Check current Amazon price
- Homebrew Kettle Clip On Thermometer: Check current Amazon price
Add a hydrometer and a bag of no-rinse sanitizer and you are done spending for batch one.
A batch of extract beer costs less than a case of decent craft beer at the store, and the equipment carries forward to every batch after it. The genuinely expensive outcome is the ruined batch: four weeks of waiting and a drain pour because the wort was pitched 15 degrees too warm. That is the math that makes a cheap thermometer the best money on this list.
Buy the kit, clip the thermometer on the rim, read the dial before you pitch, and write the numbers down. That is the whole job. Everything else in this hobby is a refinement of those four habits.