Twelve years and 50-plus logged batches after my first scorched Mr. Beer experiment, I still think about home brewing equipment the same way: the recipe decides what the beer could be, and the gear decides whether you actually get it. I spent three years as an assistant brewer at a 7-barrel brewpub in Grand Rapids, running gravity and pH checks on every tank, every day, and the habit that stuck is the one that shapes everything on this site. Measure it, write it down, and never trust a product that can't survive a full brew day without embarrassing itself.
These four pieces sit at four different stages of the pipeline. One crushes the grain, one boils the wort, one moves the beer, and one serves it. They are not competitors in the usual sense, which is exactly why the comparison is useful: most brewers buy them in the wrong order, spend money on the wrong stage, and then wonder why brew day still takes six hours and ends with a sticky floor.
The single best home brewing equipment purchase for most people is the kettle, and specifically a 7.5-gallon one, because batch size is the one decision nothing else in your brewery can fix. Buy the kettle first if you're still boiling in a stock pot, the auto siphon the first time you catch yourself starting a transfer with your mouth, the mill when you start buying base malt by the sack, and the keg kit when bottling day becomes the reason you skip brewing.
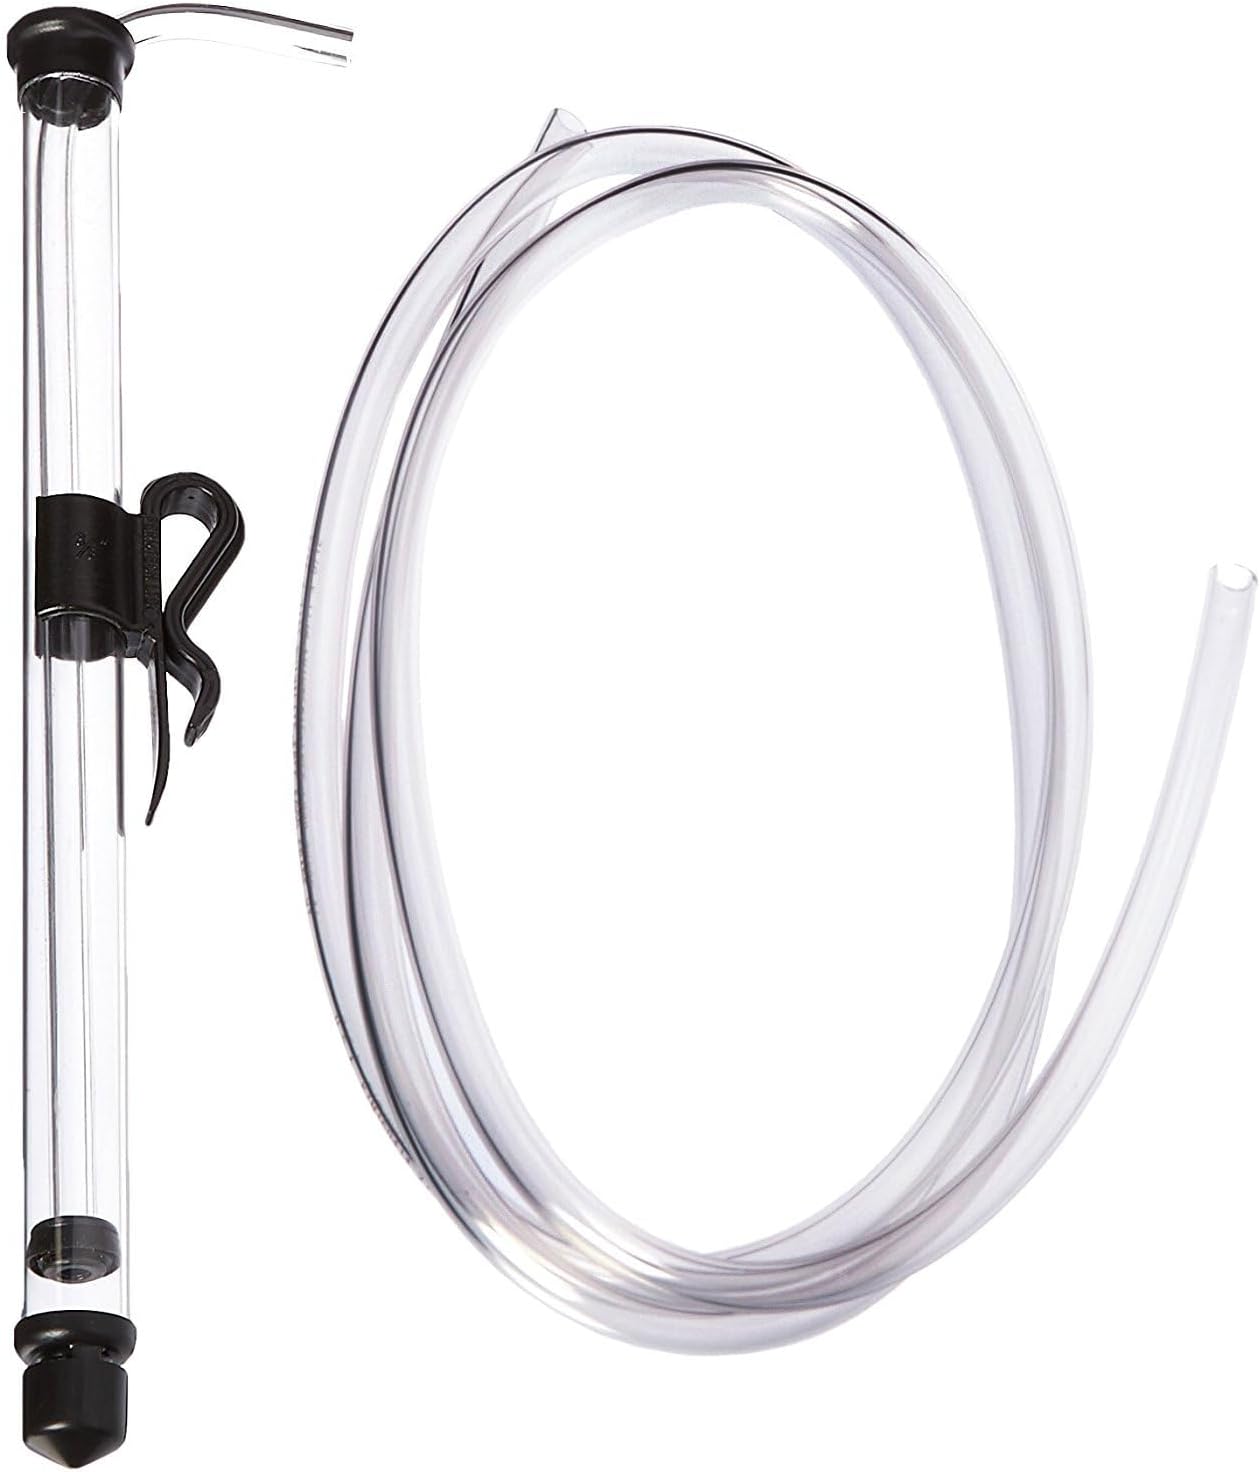
Fermtech Auto Siphon Mini with 6 Ft of Food Safe Tubing & Clamp
Complete small-batch transfer system with tubing and clamp included; the cheapest way to stop mouth-starting a siphon
Mini body moves less volume per stroke, so a full 5-gallon rack takes longer; the tubing is the first part to cloud and need replacing
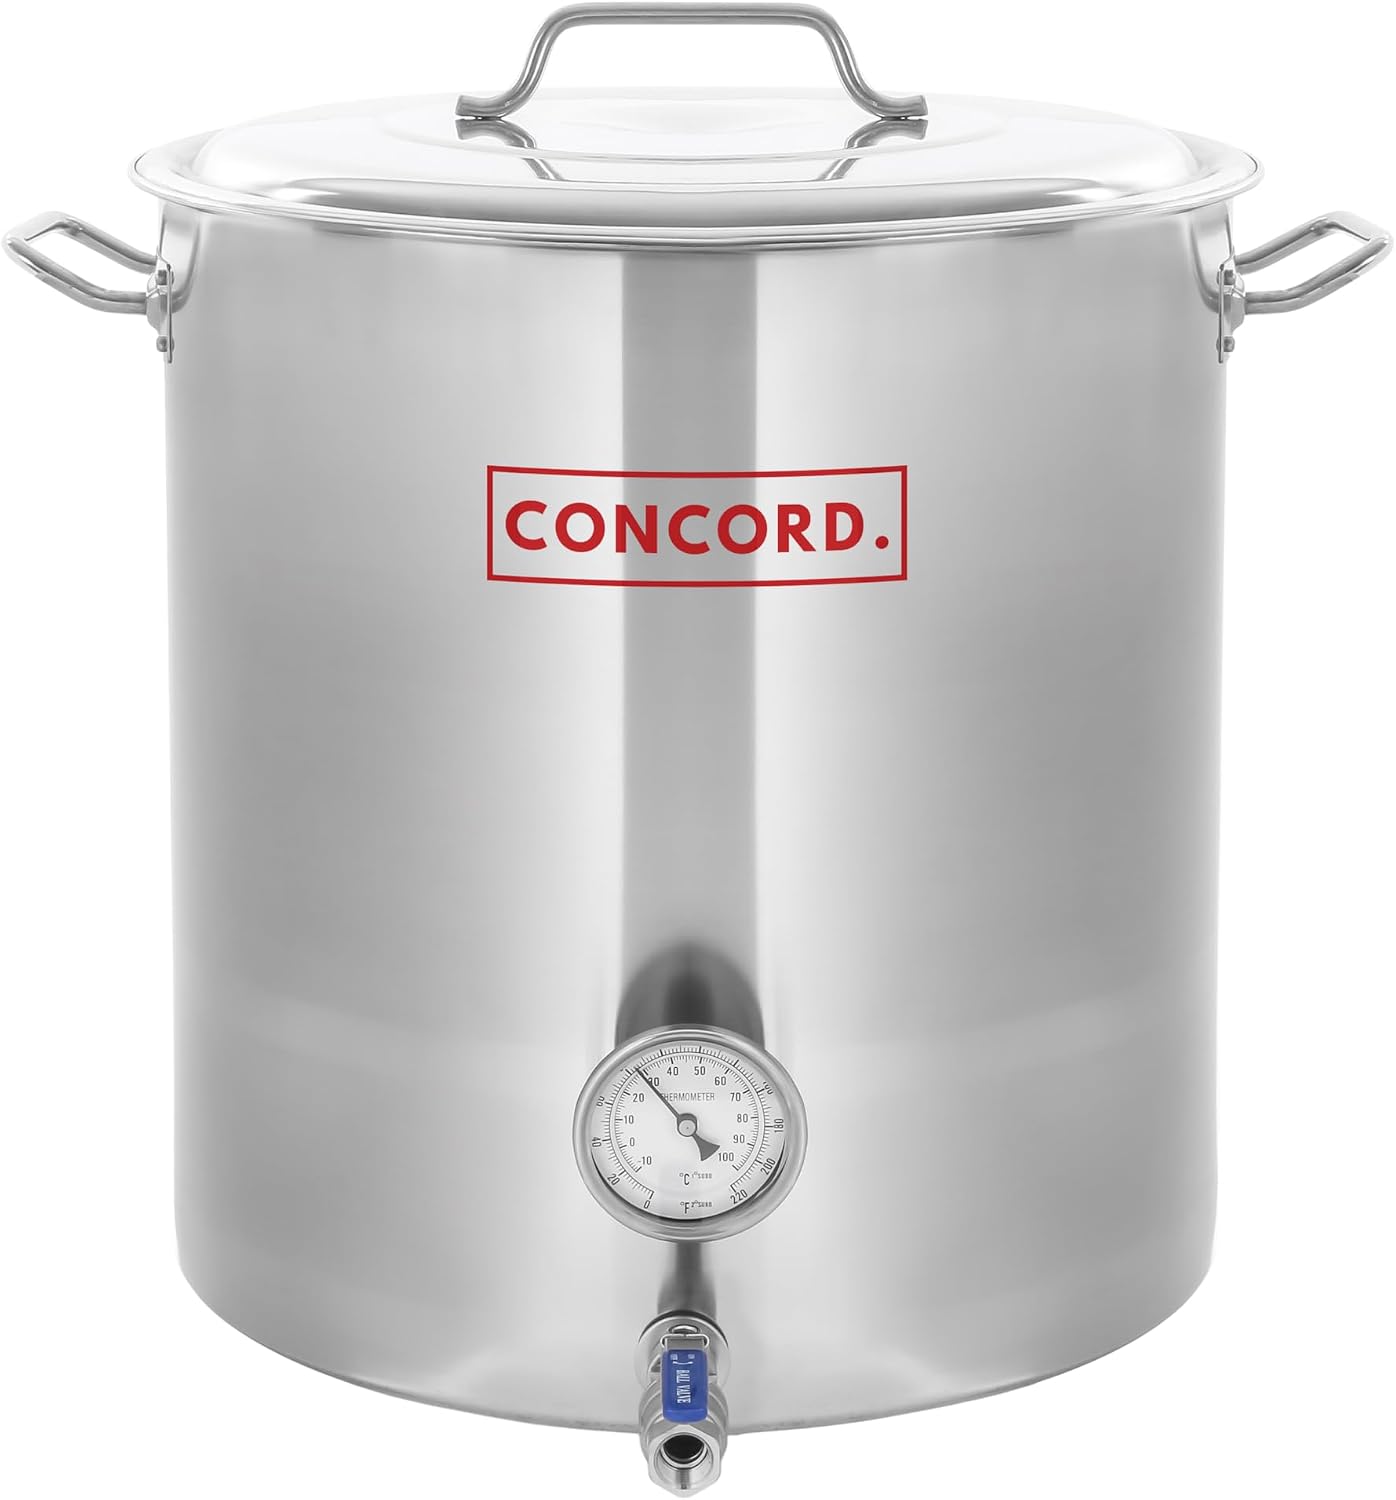
CONCORD Stainless Steel Home Brew Kettle Stock Pot (Weldless Fittings) (30 QT / 7.5 Gal)
7.5 gallons gives real headroom over a 5-gallon boil; weldless fittings mean a weeping valve is a five-minute repair, not a dead pot
Weldless joints are a maintenance item you have to check before every brew day; it is a pot, so the burner, thermometer, and volume markings are still on your budget
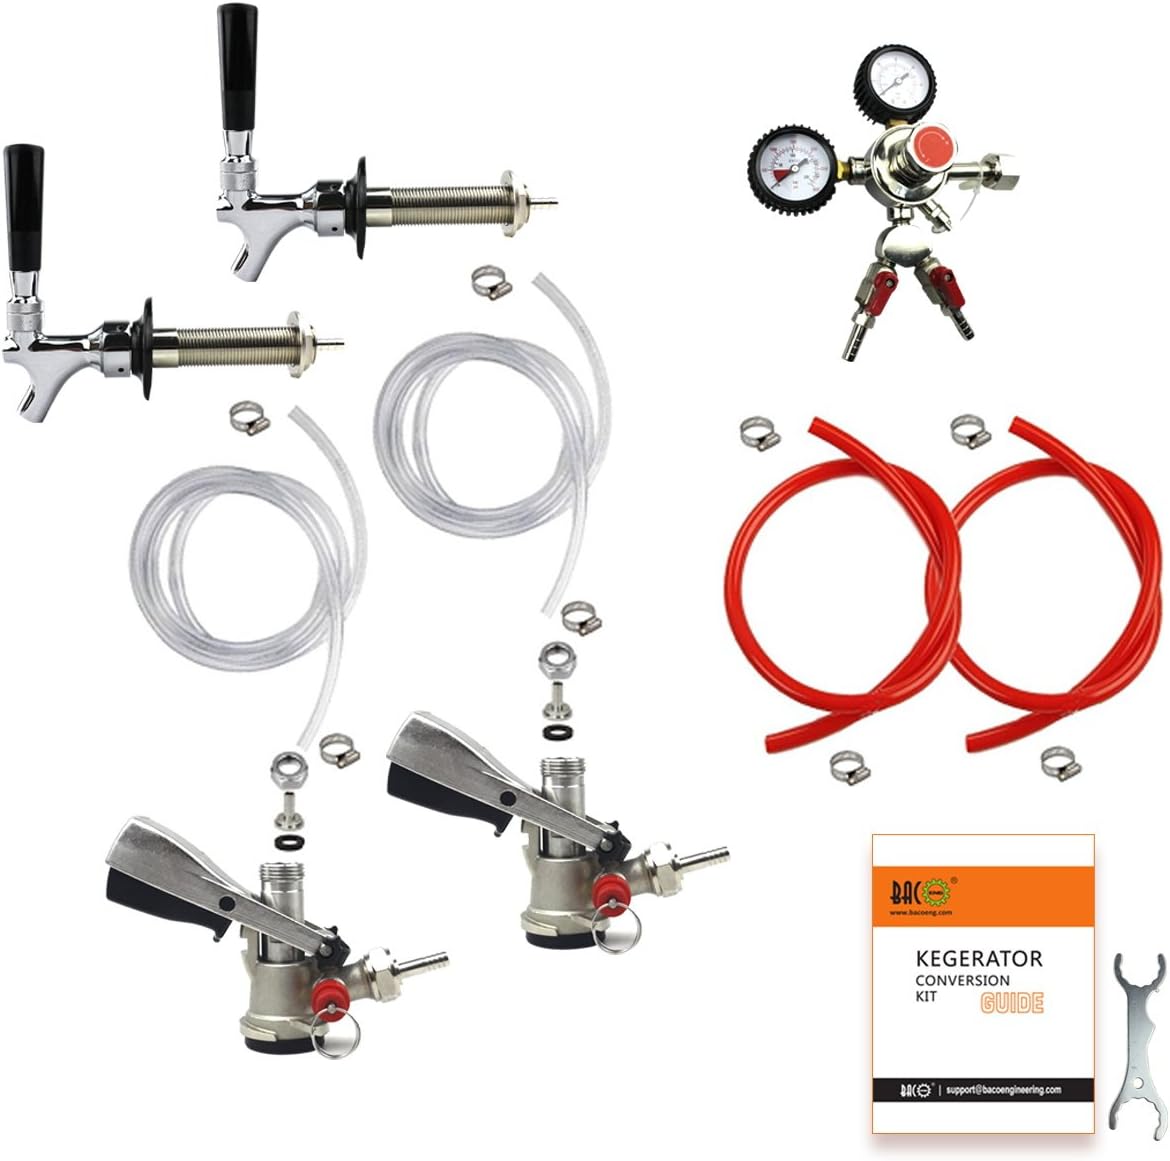
BACOENG Double Faucet Door Mount Kegerator Refrigerator Conversion Kit No Tank
Two taps from one fridge, door mount keeps the top of the fridge intact, and the no-tank configuration lets you size your own CO2
You still need a tank, a regulator, gas and beer line, and a fridge that fits; conversion-kit faucets are usually where the corners got cut
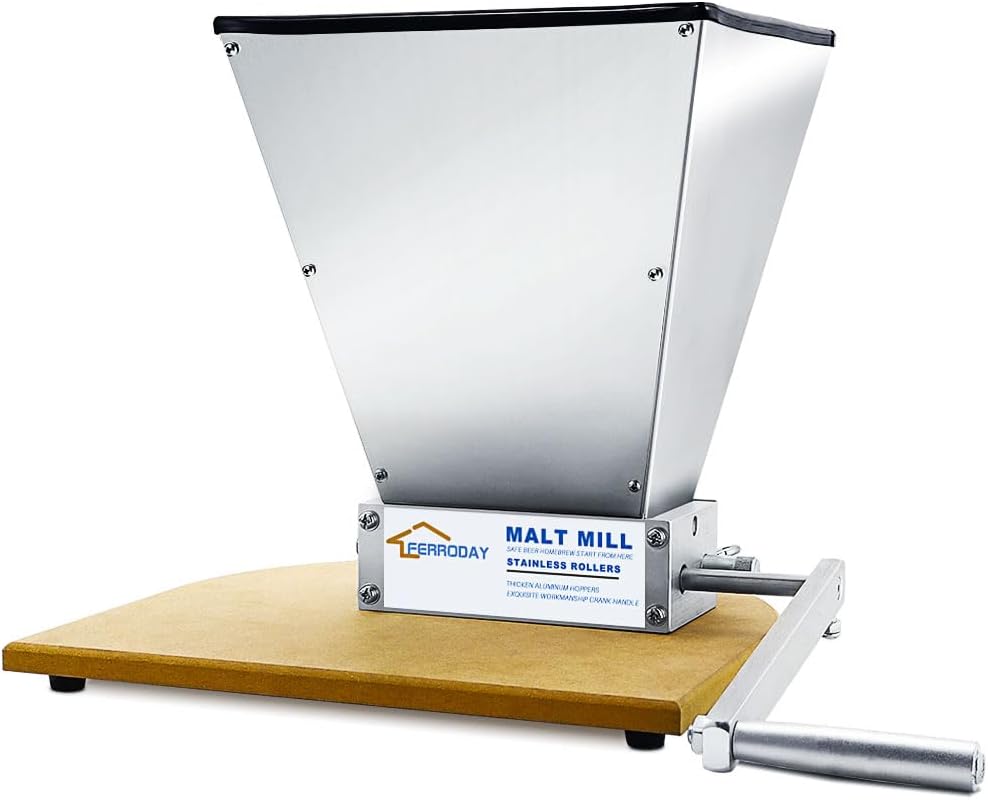
FERRODAY Malted Grain Mill for Grain Malt Barley, 2 Roller Stainless Steel
Crushing your own grain is the difference between fresh and stale, and the adjustable two-roller gap covers barley, wheat, and rye
Hand cranking 10 pounds of grain gets old fast, so budget for a drill; the wrong gap gives you a stuck sparge instead of a great crush
Prices and availability were captured from Amazon Creators API and may change.
How I judge home brewing equipment
I score gear on three things, and none of them are the adjectives on the box.
The first is serviceability. Anything that touches wort or beer will eventually fail, and the only question is whether failure costs you a gasket or a product. A weldless valve can be re-seated. A welded-in thermometer that reads wrong is a permanent lie bolted to your kettle. I still remember the $35 pump that died mid-sparge on batch 41, and I remember it because there was no fix, only cleanup.
The second is single responsibility. Gear that does one job completely beats gear that does three jobs badly. A stock pot that boils well is worth more than a kettle with a built-in thermometer, a sight glass, and a drain that all need attention on brew day.
The third is the sanitation surface. Every joint, every threaded fitting, and every length of tubing is a place where something can hide. That is why the tubing on a siphon matters as much as the siphon body, and why I replace clear vinyl line long before it looks like it needs it.
I also weight how many full brew days a product survives before it breaks, leaks, or foams over. That survivability score is the thing I'm building into my 2026 rankings, and it is the honest reason cheap gear sometimes beats expensive gear on this site.
The kettle is the one decision you can't undo
A 30-quart kettle is 7.5 gallons, and that number is the entire argument. A 5-gallon batch starts with roughly six to six and a half gallons of wort in the kettle and boils down over an hour, so every gallon of headroom above that is insurance against a boilover at minute 40 when the first hop charge hits a rolling boil. I have scraped hop sludge off a garage floor enough times to treat headroom as a spec, not a luxury.
The weldless fittings are the part of the CONCORD design I would argue hardest for. A welded-in valve is a permanent decision made by whoever welded it, and when it starts weeping you own a very nice stock pot. A weldless valve is a gasket, a nut, and a few minutes with a wrench, which means the failure mode is annoying instead of terminal. The honest trade-off is that weldless joints are a maintenance item: check the gasket and snug the fitting before every brew day, because a leak at strike temperature announces itself with six gallons of hot wort already in the way.
What you're buying here is a pot, not a system. Set aside budget for a thermometer you trust and a way to mark volume, and understand that 7.5 gallons is comfortable for a standard batch and tight for a 90-minute boil on a high-gravity barleywine. If you brew big beers and brew them often, size up.
The grain mill is the quiet money saver
Pre-crushed grain is convenient right up until you smell it. Once a kernel is cracked, the clock is running, and base malt that sat in a warehouse pre-crushed is not the same ingredient as base malt you cracked an hour before mash-in. That gap is where the FERRODAY mill earns its place.
Two stainless rollers, an adjustable gap, and a design with fewer alignment points than a three-roller mill is the right first mill. Stainless matters because rollers are the wear part and rust is the enemy of a consistent crush. The adjustment matters because barley, wheat, and rye want different gaps, and a mill you can dial in is a mill that stops giving you stuck sparges. That phrase is not an abstraction to me; a clogged grain bed is the exact reason I stopped fighting cheap equipment years ago.
The catch is the labor. Ten pounds of grain through a hand crank is a workout, and most brewers end up driving the mill with a drill. That is an extra tool and an extra skill, because too much speed shreds husks and turns your grain bed into concrete. Storage is the second cost: a mill takes shelf space, and grain dust gets everywhere. If you buy base malt by the sack, the math tips in its favor quickly, and the difference in freshness shows up in the glass, not on a spec sheet.
The kegerator kit is a pipeline decision
Bottling is where homebrewers stall. A 5-gallon batch is roughly 48 bottles, and that means 48 rounds of sanitizing, filling, and capping before you get a single glass. The BACOENG double faucet door mount kit is a shortcut around that entire afternoon, and it is worth being clear about what it is: a conversion kit for a refrigerator you already own, with two faucets, and without a CO2 tank.
I like the door mount for one reason. A tower looks better in photos, but it means drilling the top of a fridge and giving up whatever shelf space the shanks occupy above it. Door mounting moves the hardware to the door face, keeps the interior height, and gets you two taps on one fridge, which is the difference between a pale ale on tap and a porter you keep meaning to tap.
The no-tank configuration is either a feature or a hidden line item depending on what is already in your garage. If you own a CO2 tank and regulator, buying them again is waste. If you don't, factor them in, along with gas line, beer line, a manifold or splitter, and a fridge that has a flat enough door. And watch the faucets. On conversion kits, the faucets are usually the part that got cheaper, and a bargain faucet is the most common reason a home kegerator pours foam instead of beer.
The auto siphon is the cheapest upgrade in the hobby
I'll say the uncomfortable thing plainly: putting your mouth on a racking tube is the single most preventable infection risk in home brewing, and it is also the most common one. The Fermtech Auto Siphon Mini ends that habit for the price of a couple of pints, and it arrives as a complete system with 6 feet of food safe tubing and a clamp rather than a body you have to shop for hose to match.
Small batches are where the mini body makes the most sense. A 1-gallon or 3-gallon carboy does not need a full-size siphon, and a smaller tube is easier to keep sanitized and easier to steer around a yeast cake. The trade-off is throughput: the mini bore moves less volume per stroke, so racking a full 5 gallons takes longer than it would with a larger siphon, and the clamp is a basic pinch clamp with no flow control.
The tubing is the part that will retire first. Clear vinyl clouds, stiffens, and stops being something you want touching finished beer. Buy it in a length, plan on replacing it, and treat the siphon body as the durable half of the purchase. This is the lowest-cost, highest-return item in this entire comparison, and it belongs in a beginner's kit on day one.
The trade-offs, laid out plainly
- Kettle: you gain capacity and serviceability, you give up portability and stove-top convenience. It is also the only purchase here that locks in your batch size.
- Mill: you gain grain freshness and control over your crush, you give up convenience, shelf space, and a chunk of your brew day to cranking or drilling.
- Kegerator kit: you gain a pipeline that ends in a glass instead of a bottle tree, you give up fridge space, floor space, and the money for a tank, a regulator, and line.
- Auto siphon: you gain the cheapest sanitation win available, you give up some transfer speed on larger batches.
What this gear does not fix
None of these four will make mediocre beer good, and pretending otherwise is how people end up with a $500 brewery and a 1.020 stout they call "rich" instead of under-attenuated. Fermentation temperature control, a healthy pitch of yeast, and water chemistry sit upstream of every product on this page. Gear buys control. Recipes and process buy flavor.
That is also why I rank by the number in my notebook rather than the number in a marketing paragraph. If your final gravity isn't where you predicted, the fix is usually a thermometer reading, a pitch rate, or a fermentation chamber, not a shinier kettle.
The order I would buy them in
Start with the auto siphon if you're still transferring by mouth, because it is the smallest spend with the largest hygiene return. Then the kettle, because batch size is a decision you cannot unmake. Then the mill, once you're buying base malt by the sack. Then the keg kit, once bottling day is the reason a batch sits in the fermenter an extra month.
What's next on my bench
I'm stress-testing pressure fermenters for a full write-up, and I'm still building out that survivability score: how many brew days a product survives before it breaks, leaks, or foams over. If a piece of gear can't get through a 90-minute boil, a hop sludge cleanup, and a cold-side transfer without drama, it doesn't make the next ranking. That is the standard these four were measured against, and it is the standard everything on this site gets held to.