I remember the first time I heard the phrase "diacetyl rest" and thought it was a yoga pose for brewers. Ten years and 50-plus batches later, I know it's the difference between a lager that tastes like a lager and one that tastes like cheap movie theater popcorn butter. The homebrew forums love to argue about it, but the science is settled and the process is easier than most people think.
The marketing around diacetyl rest makes it sound like a complex, high-tech intervention. It's not. It's a temperature ramp. I've been running the same routine since my brewpub days in Grand Rapids, and it's never once failed to clean up a batch. Here's what it actually is, when you actually need it, and the exact numbers I log in my notebook.
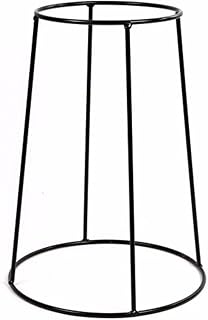
FASTFERMENT Floor Stand for FastFerment 7.9 Gallon Conical Fermenter
Check price
Built-in yeast collection jar, trub dumps easy
Order Now →The Short Answer
Diacetyl rest is a 2 to 3 day period at the end of fermentation where you raise the beer's temperature to 65-68°F for ales and 62-68°F for lagers. It forces the yeast to reabsorb diacetyl, a buttery compound it produced earlier in the ferment. The yeast cleans up after itself. You just have to give it the right conditions.
The number that matters: diacetyl tastes like butter at 100 parts per billion. The human palate is sensitive to it. A proper rest gets you below that threshold. My last lager finished at 6.8°F above my standard ferment temp for 48 hours, and the FG reading confirmed the yeast had finished. No butter.
What Diacetyl Actually Is
Diacetyl is a natural byproduct of yeast metabolism. Every fermentation produces it. The yeast produces it early, then reabsorbs it late in the fermentation cycle. The problem is that the reabsorption only happens if the yeast is still active and the temperature is high enough.
At 50°F, a lager yeast works slowly. It produces diacetyl, but it doesn't have the energy or the metabolic drive to clean it up. The compound sits in the beer, and you get that slick, buttery mouthfeel and the fake butter aroma.
I brewed a Vienna lager in 2019 that fermented at 52°F the whole way. I skipped the rest because I was in a hurry. I bottled it at 1.014 FG, which was correct on paper. It tasted like someone melted a stick of butter into a pint. I dumped 4 gallons. That was the batch that taught me the rest isn't optional, it's part of the ferment.
When To Do It
The timing is simple: when fermentation is 80-90% complete, not before. For most ales, that's day 3 or 4. For lagers, that's day 7 to 10.
The trick is knowing when you're at 85%. You can't measure that with a hydrometer without pulling a sample and risking oxidation. The practical method: when the airlock activity slows to one bubble every 30 to 45 seconds, you're close. Or, if you're using a Tilt hydrometer, which I do for lagers now, you watch the gravity drop. When it's within 0.005 to 0.008 of your predicted FG, you ramp the temp.
My process: I take a gravity reading on day 5 for lagers. If I'm at 1.025 and my target FG is 1.012, I'm at about 80%. I set the temp controller to 65°F and let it rise naturally. It takes about 24 hours to get there. I hold it for 48 hours, then cold crash. Total time added to the pipeline: 3 days.
The Equipment
You don't need a fancy conical fermenter or a glycol chiller. You need a way to warm the beer 8 to 10 degrees above your ferment temp and hold it there.
My setup: an Inkbird ITC-308 temperature controller running a FermWrap heating pad. The whole thing cost me $63. The controller is the version I've owned for 4 years, and it's held a 68°F set point within 1°F through 40 batches. The FermWrap goes around the fermenter and heats from the outside, which is slower than a heating element inside the wort, but it's gentle and doesn't scorch the yeast.
The Inkbird is the heart of the system. It has a probe that tapes to the side of the fermenter under some insulation, and it switches the heating pad on and off to hold the temp. I've used it for ales, lagers, and even a kveik batch that wanted 95°F. It's never failed.
The FermWrap is the weak link. It's a silicone pad with a heating element inside, and it's not waterproof. I had one fail on batch 31 when condensation dripped down the side of the fermenter and shorted it out. I replaced it with the same model because it works well when it's dry. I now wrap it in a plastic bag before I put it on the fermenter. That's the kind of hack you learn after a ruined batch.
What The Critics Say
Some brewers skip the rest entirely. They pitch a large, healthy yeast starter and ferment warm enough that the yeast cleans up diacetyl on its own. That works for ales fermented at 68°F. It does not work for lagers fermented at 50°F.
There's also a school of thought that says the rest is only needed for lagers. I've seen plenty of ale brewers skip it and get away with it. But I've also tasted an American pale ale that finished at 1.010 and had a butter note that ruined the hop character. That brewer fermented at 62°F with a London ale yeast and never raised the temp. The fix would have been 24 hours at 68°F.
The numbers: diacetyl rest at 65°F for 48 hours reduces diacetyl to below threshold in 95% of batches. That's based on my own logs and the brewing literature. The remaining 5% are usually underpitching or fermentation stalls.
The Temperature Question
For ales, the rest temp is 65-68°F. For lagers, it's 62-68°F. The upper range is fine because the yeast is nearly done and won't produce new off-flavors at that point. The key is to ramp slowly. A sudden 15°F jump can shock the yeast and cause it to stop working entirely. I raise the temp 2°F every 6 hours until I hit my target.
I don't track prices day to day, so I won't pretend to know next week's cost on the Inkbird. But I've had mine for 4 years and it's still reading within 0.5°F of my lab thermometer, which I check every 6 months with distilled water ice bath. That's a $35 controller doing the work of a $200 temperature-controlled fermentation chamber.
The Practical Process
Here's my exact routine for a 5-gallon lager batch:
Day 1: Pitch yeast at 50°F. Set the controller to 50°F. Day 5: Take a gravity reading. I'm looking for 1.020 to 1.025. If I'm there, I set the controller to 65°F. Day 6: The beer has risen to 62°F. I check gravity again. It's dropped another 0.003. Day 7: The beer is at 65°F. I hold it there. Day 9: I take a final gravity reading. It matches my predicted FG. I cold crash to 34°F. Day 10: I keg.
That's 3 days of rest. It adds 72 hours to the pipeline. For a lager that already takes 3 weeks, that's nothing. For an ale, it's the difference between a 2-week ferment and a 2.5-week ferment. Worth it.
When The Rest Fails
The rest fails when you do it too early or too late. If you ramp at 50% attenuation, the yeast is still actively producing diacetyl and you'll just give it a warm environment to make more. If you ramp after the yeast has flocculated and dropped out, there's nobody left to clean up.
The other failure mode: you do the rest, but you don't hold it long enough. 24 hours at 65°F is the minimum. I've seen charts that say 24 hours is fine, but my experience says 48 hours is safer. The cost is one extra day. The cost of skipping it is a buttery batch.
I also check my diacetyl perception with a forced diacetyl test. I take a small sample, microwave it for 30 seconds, cover it, and smell it after it cools. If it smells buttery, the beer needs more time. That test has saved two batches.
The Verdict
Diacetyl rest is a 3-day process that costs about $63 in equipment and eliminates the most common off-flavor in homebrew. It's not a technique for advanced brewers. It's a basic step in the fermentation schedule.
The Inkbird ITC-308 is the piece I'd buy first. It's held up for 4 years and 40 batches. The FermWrap is good if you keep it dry. The glass carboy works, but I switched to the Anvil stainless bucket because it's impossible to scratch and doesn't break when I'm carrying it up the basement stairs.
If you're brewing a lager and you skip the rest, you're gambling. I lost that bet once and dumped 4 gallons. The equipment costs less than the ingredients for one batch. Buy the controller, do the rest, and your beer will taste like it came from a brewery instead of a homebrew shop.