Most people buy their first homebrew starter kit the way I bought mine in 2014: they see a box on a shelf, like the picture on the front, and take it home. Then brew day arrives, the wort is cooling, and you find out the kit has no hydrometer, the spigot drips onto the kitchen floor, and the instructions say something like "ferment until it looks done."
That first batch was a scorched Mr. Beer kit brewed on a dorm hot plate. I called it burnt adjunct lager. Twelve years and more than 50 logged batches later, including three years as the assistant brewer at a 7-barrel brewpub in Grand Rapids, I can tell you the failure was never the recipe. It was the kit.
This is how to pick a homebrew starter kit that is still earning its shelf space at batch twenty, whether you want five gallons of Hank's Hefeweizen or two gallons of something small enough to ferment on a counter. The decision comes down to space, batch size, and whether you can measure what you made.
Why you should trust me
I brewed my first batch in 2014 and I have logged every one since. Original gravity, final gravity, strike temperature, mash pH, the 24-hour gravity reading, packaging losses, and the exact garage temperature all go into a spiral notebook with a spreadsheet backup.
From 2019 to 2022 I was the assistant brewer at a 7-barrel brewpub, where I scrubbed heat exchangers, harvested yeast, and ran gravity and pH checks on every tank, every day. My hydrometer gets calibrated in distilled water at 60°F before every batch, because a 0.002 error ruins a recipe log. Cheap gear that fails mid-batch has cost me three ruined brew days, so nothing here gets recommended on the strength of the box art.
How I picked these two kits
The two kits below are the two honest starting points in this hobby: five gallons in a bucket, or two gallons in a conical. I judged each one on four things that decide whether a first kit becomes a habit or a closet item.
First, batch size versus the space you actually have. A five gallon fermenter needs a cool corner and a stove or burner that can handle a big boil. A two gallon fermenter fits on a counter and often inside a spare fridge, which is a bigger deal than it sounds.
Second, the fermenter itself. A kit lives or dies on whether the vessel seals, whether the spigot seals, and whether you can clean it without a brush contorting into corners.
Third, what comes in the box. Bottles, caps, an airlock, a recipe: the more of that is included, the fewer separate orders you place before your first brew day.
Fourth, and this is the one most people skip, whether you can measure what you made. A kit that sends you to the fermenter without a hydrometer is a kit that asks you to guess, and guessing is how people bottle beer that has not finished fermenting.
I have not hidden the flaws below, because the flaws are what you live with at batch ten. That is where a kit either earns its place or ends up in the "maybe sell" box.
The two kits worth your first brew day
Both of these are complete enough to get you from an empty kitchen to packaged beer. They are built for different people, and that is the point.
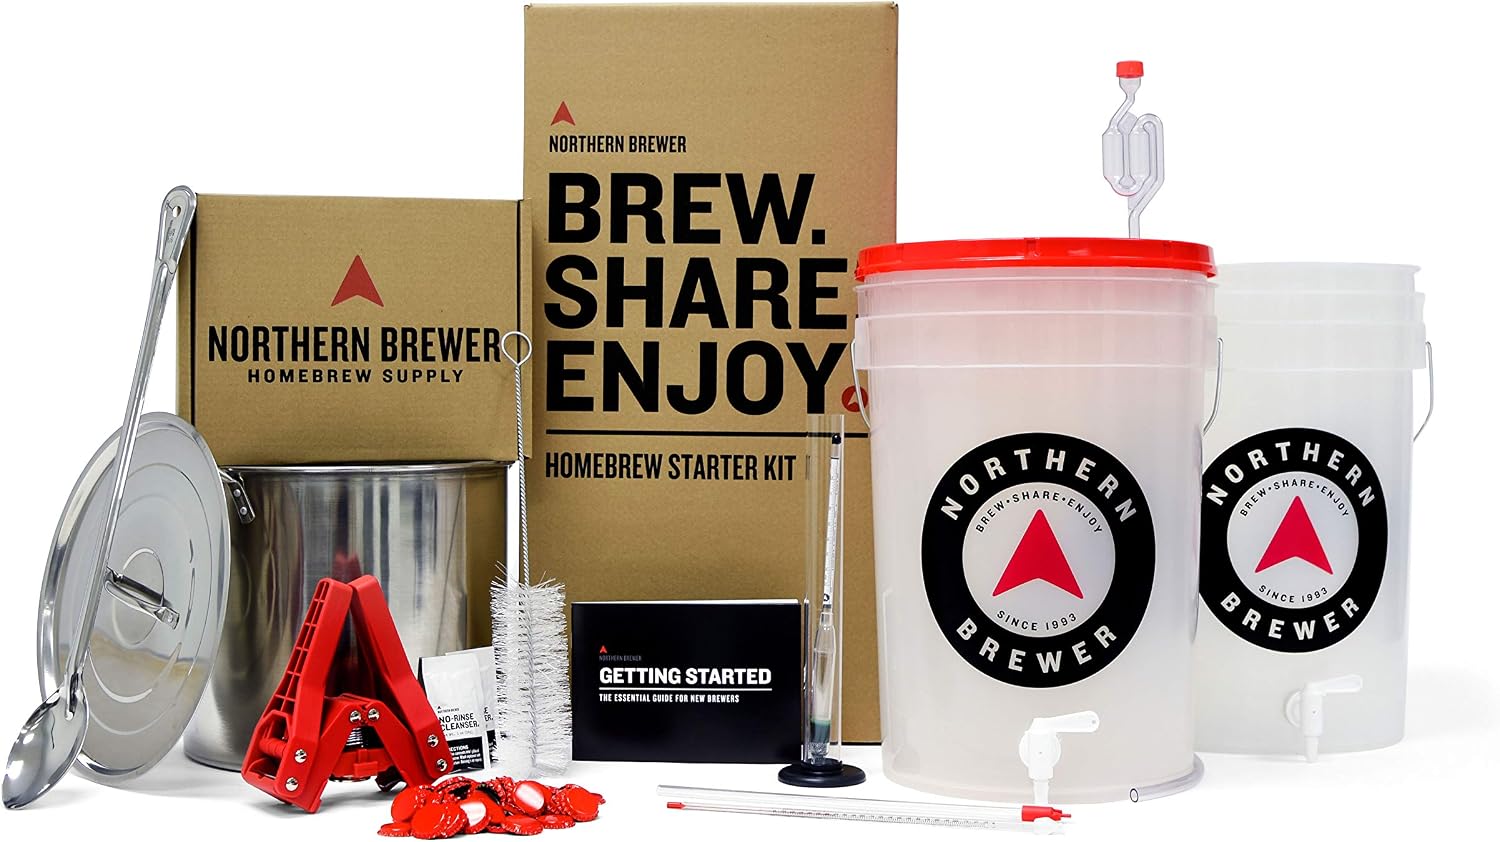
The 5-gallon pick: Northern Brewer - Brew. Share. Enjoy. HomeBrewing Starter Set, Equipment and Recipe for 5 Gallon Batches (Hank's Hefeweizen)
 Visit on Amazon →
Five gallons is the standard batch size in American homebrewing, and that is the strongest argument for starting here. Every recipe kit on the market is written for it, every club member you meet brews it, and when you eventually want to split a batch or enter a competition, five gallons is the volume that fits. The included recipe is a hefeweizen, which is a forgiving first beer: the yeast does the heavy lifting on flavor, and a wheat beer covers the small process mistakes that a pale lager would put under a spotlight.
The equipment in this set is honest rather than flashy, and the ingredients ship fresh, which matters more than the fermenter's plastic thickness. If you have brewed with a friend, or you already own a big kettle and a pile of bottles, this is the box that gets you from zero to a full five gallon pipeline in one order.
Flaws but not dealbreakers: the plastic fermenter's spigot will eventually drip. This is the most common and most preventable failure in the hobby, so buy a replacement spigot on day one and keep it in the parts bin. Also, five gallons is heavy and awkward once it is full, so decide where it lives before brew day, not after.
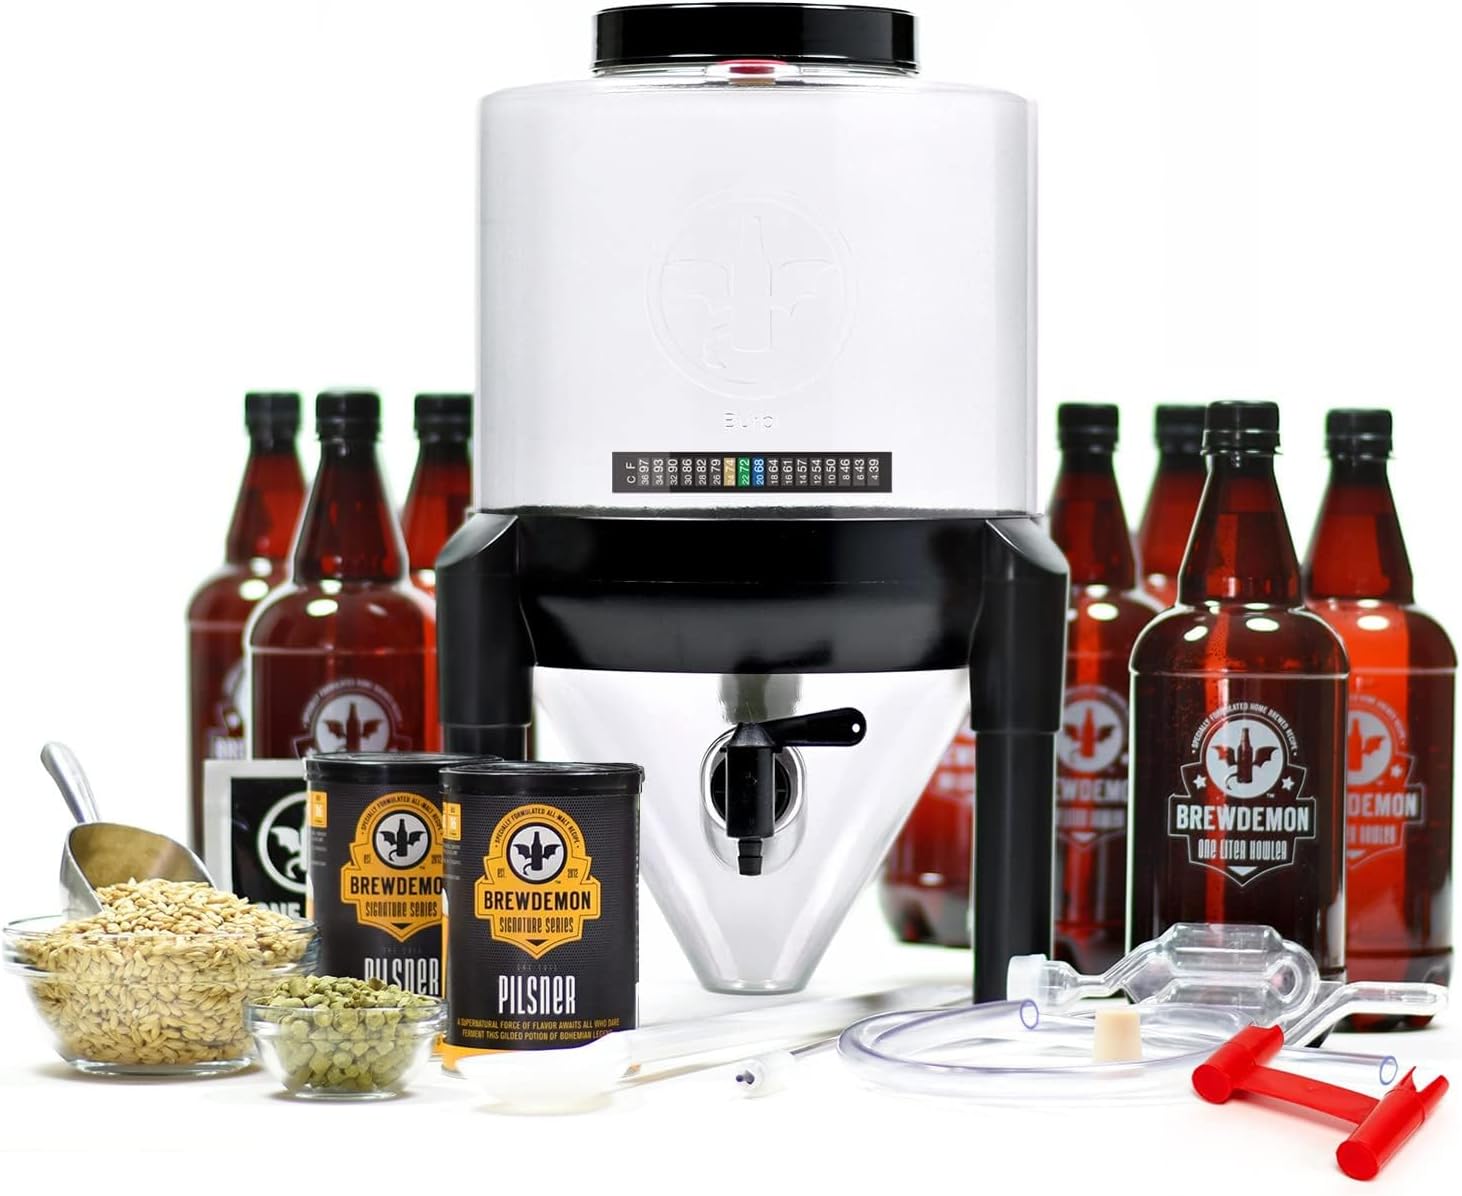
The small-batch pick: Revolutionary Signature Pro, 2 Gallon Conical Beer Kit with Bottles
 Visit on Amazon →
Two gallons is the size I recommend to anyone in an apartment, anyone with a glass-top stove, and anyone who is not certain they will still be brewing in six months. The conical shape is the reason this kit is interesting: sediment gathers in the cone instead of spreading across the entire floor of the fermenter, which means less junk near your racking point and clearer beer in the bottle. Bottles are included, which removes one of the quiet annoyances of starting out, because the alternative is drinking your way through a lot of commercial beer just to collect empties.
The tradeoff is volume. You will brew more often for the same amount of beer, and the recipe kits you find in shops are usually written for five gallons, so you will be scaling recipes down or buying small-batch kits specifically. That is a real annoyance, not a dealbreaker, and it is the price of a footprint that fits in a cupboard.
Flaws but not dealbreakers: small batches leave less margin for error in your measurements, so a hydrometer matters even more here, and a two gallon batch disappears faster than you expect.
How to choose between them, step by step
Step one: measure your space, not your enthusiasm. Walk to where the fermenter will sit and confirm the footprint. A two gallon conical fits on a counter or in a spare fridge, and that fridge also gives you temperature control, which is the single biggest upgrade in homebrewing.
Step two: count your bottles and your patience for cleaning them. A five gallon batch means a lot of bottle washing, and the two gallon kit including bottles is worth real money in saved hassle.
Step three: check for a hydrometer before you buy. You need original gravity and final gravity to know fermentation finished. If the kit does not include one, add it to the cart. This one is non-negotiable for me.
Step four: read the recipe and the instructions before you order. If the instructions say to trust your instincts on temperature, close the tab. Instincts are why my first batch fermented at 82°F and tasted like banana bubblegum. You want numbers: a target fermentation temperature, a target gravity, a target volume.
Step five: plan the boil. Five gallons needs a bigger kettle and a stronger heat source than two gallons. If your stove struggles to boil a large pot, that is your answer, and it is not a knock on either kit.
Step six: plan the cold side. Fermentation temperature control is the difference between a good first beer and a discouraging one. A spare fridge with a temperature controller, or a cool basement corner with a swamp cooler, beats any equipment upgrade you can buy at this stage.
Step seven: buy the boring extras now. A no-rinse sanitizer, a spare spigot, bottle caps if your kit does not include them, and priming sugar. Ordering these on brew day is how a brew day becomes a two week delay.
Your first brew day, in order
Clean and sanitize first. Everything that touches wort after the boil gets sanitizer: fermenter, lid, airlock, siphon, bottling wand, caps. This step is not optional and it is not a place to save ten minutes.
Brew the recipe as written the first time. Do not substitute hops, do not swap yeast, do not decide the beer needs more malt. Brew it once by the numbers, taste it, then start changing things.
Chill fast and take a gravity reading. Once the wort is cool, take your original gravity before you pitch. Write it down with the date. That number is the only way to know later what you actually made.
Pitch the yeast at the temperature the recipe names. Not at whatever the room happens to be. Then hold that temperature for the first three days, which is when most of the flavor is set.
Check gravity again when the airlock slows. Airlock activity is not a measurement. Two identical gravity readings a couple of days apart means fermentation is done.
Package when the gravity is stable. Bottle with the priming sugar the recipe calls for, cap, and store the bottles somewhere warm for a couple of weeks to carbonate. Then chill one, taste it, and write down what you would change next time.
What neither kit includes
Whatever you buy, confirm three things are in the box or on your list: a hydrometer, a no-rinse sanitizer, and a way to hold fermentation temperature. Those three items cause more first-batch failures than any difference between the two kits above.
You will also want a kettle big enough for your batch size, a long spoon or paddle, and a dedicated bucket or spray bottle for sanitizer. None of that is glamorous, and all of it outlasts the kit.
One more caveat: a conical fermenter is not automatically easier to clean than a bucket. The cone gives you clearer beer, but every valve and seam is another place for residue to hide, so a soft brush and a habit of cleaning the same day matter more than the vessel's shape.
What this all costs
The kit is the entry fee, and it is the smallest part of what you will spend in year one. The recurring cost is consumables: extract or grain, hops, yeast, priming sugar, caps, and sanitizer. That is the number that matters, because it is the number you pay again every time you brew, and it is why the kit you choose should be the kit that keeps you brewing.
A five gallon setup costs more per brew day in ingredients but spreads the equipment cost across more beer. A two gallon setup costs less per batch and lets you brew more often without drowning in beer you cannot drink. Neither is cheaper in the long run. They are just different shapes of the same hobby.
The math I actually care about is cost per bottle over the first year. It starts ugly and drops fast, because after batch three the equipment is paid for and every batch after that is ingredients and time.
Check current Amazon price on both kits before you decide, then pick the one whose batch size matches the space and the schedule you really have. That is the whole decision. The recipe is the easy part, and it always was.